 Here are two simple methods to recordthescreen on your Mac. The first method is to use the preinstalledQuickTime Player and the other one is to use Shift-Command (⌘)-5 hotkey to record your Mac screen. The Quick time player method works for all versions of Mac OS but the Shift-Command (⌘)-5 hotkey introduce in macOS Mojave. With the help of Shift-Command (⌘)-5 hotkey, you can take the screenshot of your Mac screen as well.
Contents [hide]
Record the Screen on a Mac using QuickTime
QuickTime is a video player which comes along with all macOS absolutely free. So if you don’t have macOS Mojave then you can use theQuickTime app to record your Mac screen. Just goto finder(Command (⌘)-space) and search for QuickTime, open it and start recording. Now its time to follow each and every step to record your Mac screen using theQuickTime app.
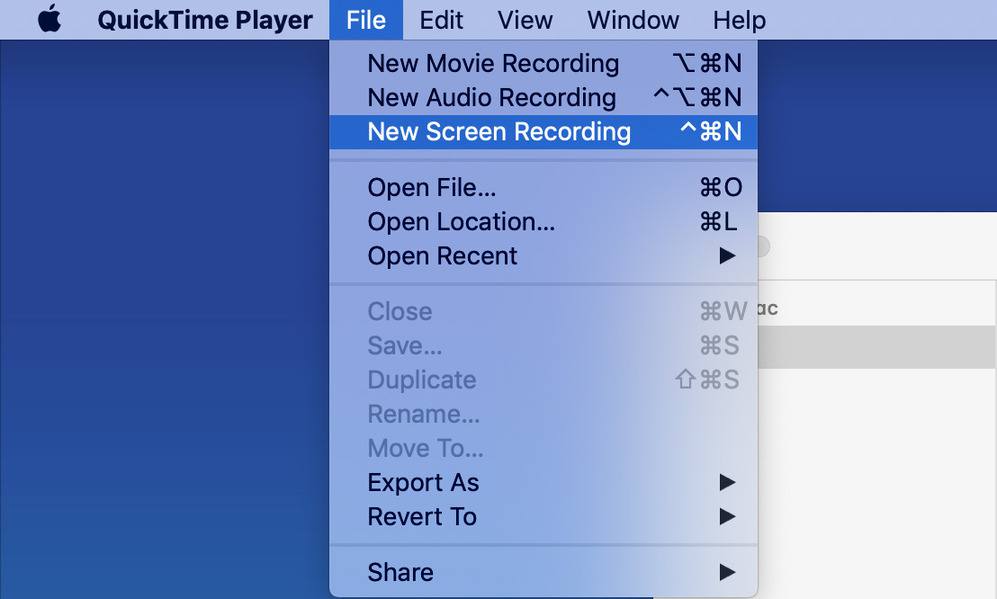
The first step is to open the QuickTime application by searching it in your spotlight search. You can open the spotlight search by pressing Command (⌘)-space.

Once you successfully open the QuickTime player, then choose File > New Screen Recording. This will opens the screen recording window.

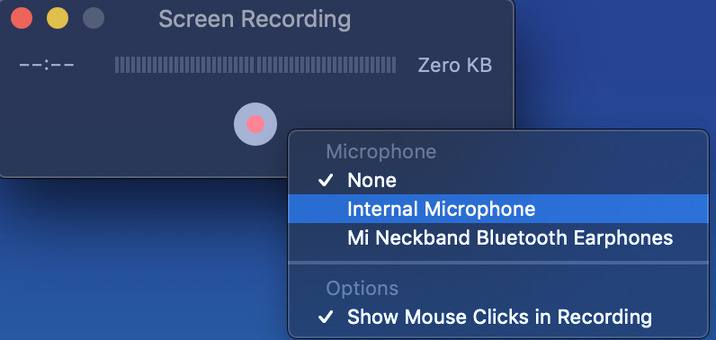
On the recording window, You can configure the recording setting by clicking the down-arrow.
Select the microphone if you want to add your voice while recording the screen others choose none.
Select the show mouse click option if you wish to enable a black circle around your pointer when you click.
Now on the record window, just click on the red-colored circle button to start the recording. Another pop-up window will appear, Click anywhere if you wish to record the whole screen otherwise select your visible area by dragging your mouse.

Once the recording is started, you will see a small round icon in your menu bar. Click this round icon to stop your screen recording.

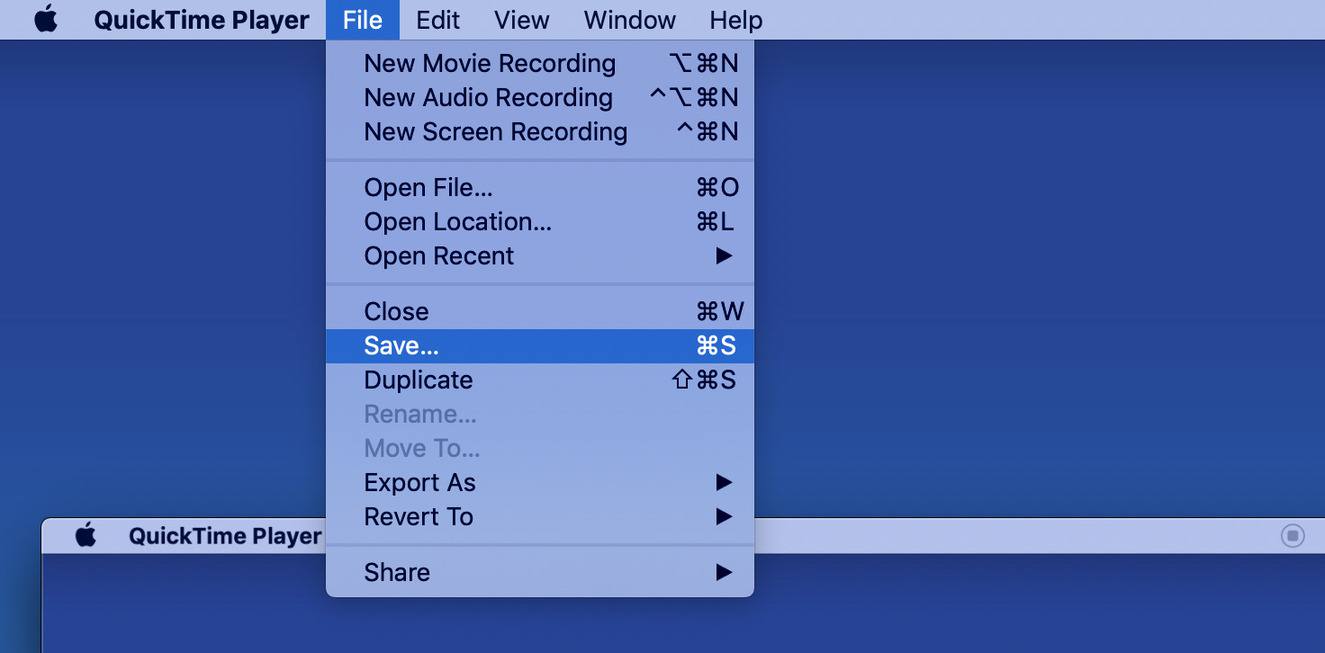
Once you click on the round icon, the recording will stop and you can review your recording. Now save you file in your by going File > Save.
Use macOS Mojave Hotkeys to record screen
In macOS Mojave, the screen recording becomes very easy. Now you can use macOS Mojave built-in tool to record your screen without using the QuickTime player. The built-in recording tool is accessible by a combination of hotkeys(Shift-Command (⌘)-5).
Open the screen recording tool by pressing Shift-Command (⌘)-5 simultaneously.
See the below images and click the icon highlighted in the below image for recording the entire or selected portion of your Mac screen.
Record For entire Screen: Just click anywhere to start the recording

Record selected portion: Drag your mouse to selected the recording area and click the record button in the onscreen controls which is besides options.

Once the recording is started, you will see a small round icon in your menu bar. Click this round icon to stop your screen recording. The recording automatically saved in your configured location.