
We have always either allowed an application from accessing the internet or keeping it in default so that it can access the internet anytime it wants. Moreover, these applications are either connected to our local network or the wide internet. However, there have been situations when we have wanted to block an application from accessing the internet.
Related Article: Firewall Vs Antivirus: What’s the difference | A Complete Guide
There are many reasons to block a program in Windows 10. You might have an application that automatically updates itself which might disturb some functionality in Windows 10. In this case, you don’t have any option but to cut internet access to that particular program. Similarly, you might have a game in Windows 10 that works offline but requires the internet to update itself or to show advertisements. Furthermore, there might be an application that spams you with unending advertisements and the best way to stop it is to block it from accessing the internet.
The best way to block an application from accessing the Internet is to create a Windows Firewall Rule. In this article, we will block internet access to any application using the Windows Firewall.
Block An Application From accessing The Internet Through Windows Firewall
-
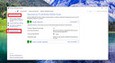
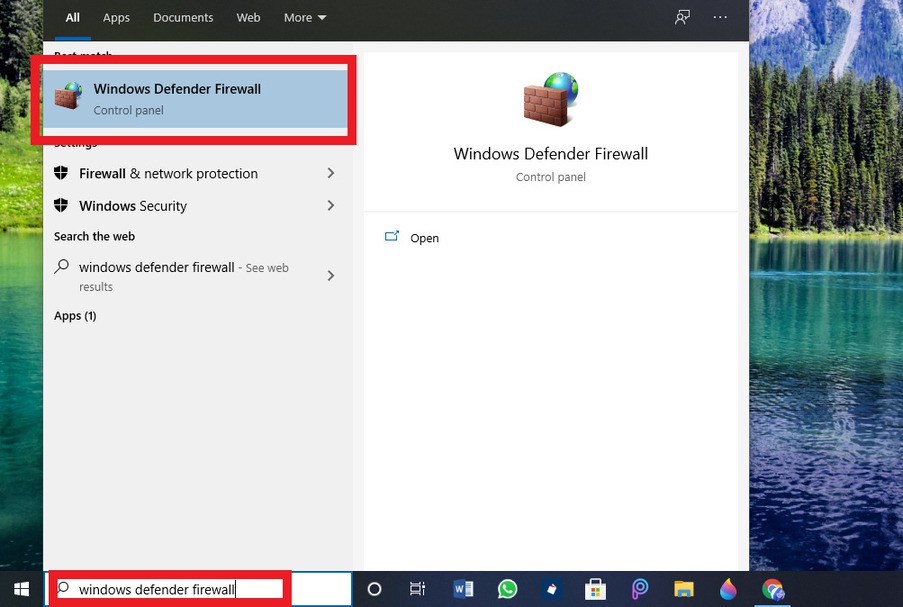
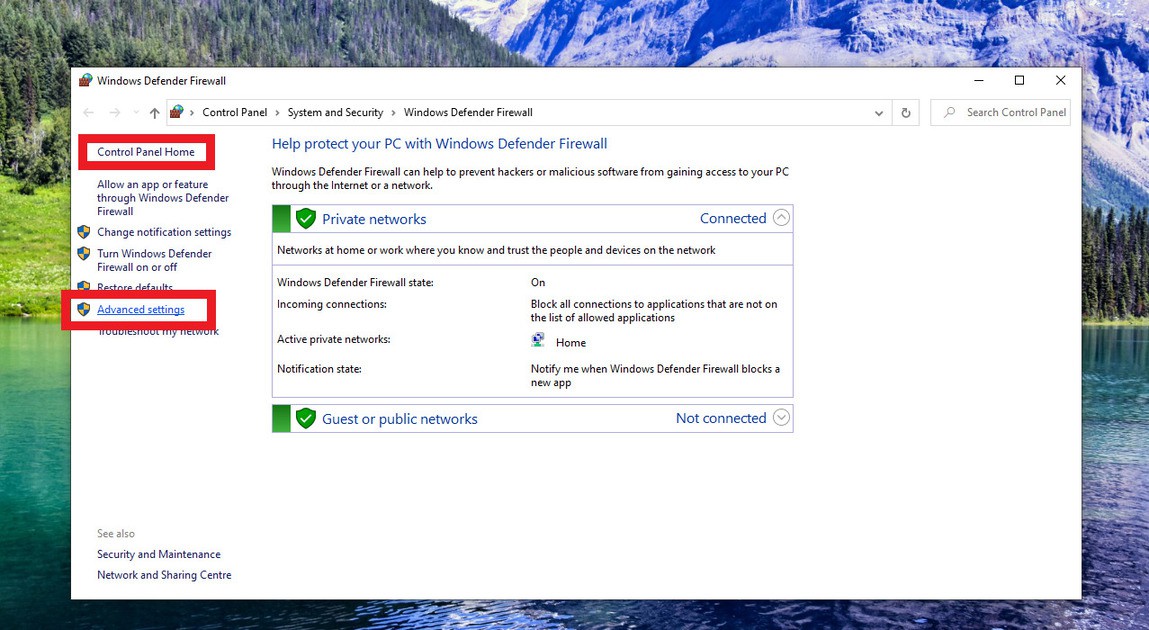
The first step toward blocking internet access is to open the Windows Defender Firewall setting. To do so type Windows Defender Firewall in the search bar and click on the first result that appears.

-
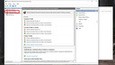
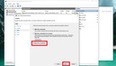
Next on the left side of the tab, you will find a list under Control Panel Home. Just click on the Advanced settings option.
-
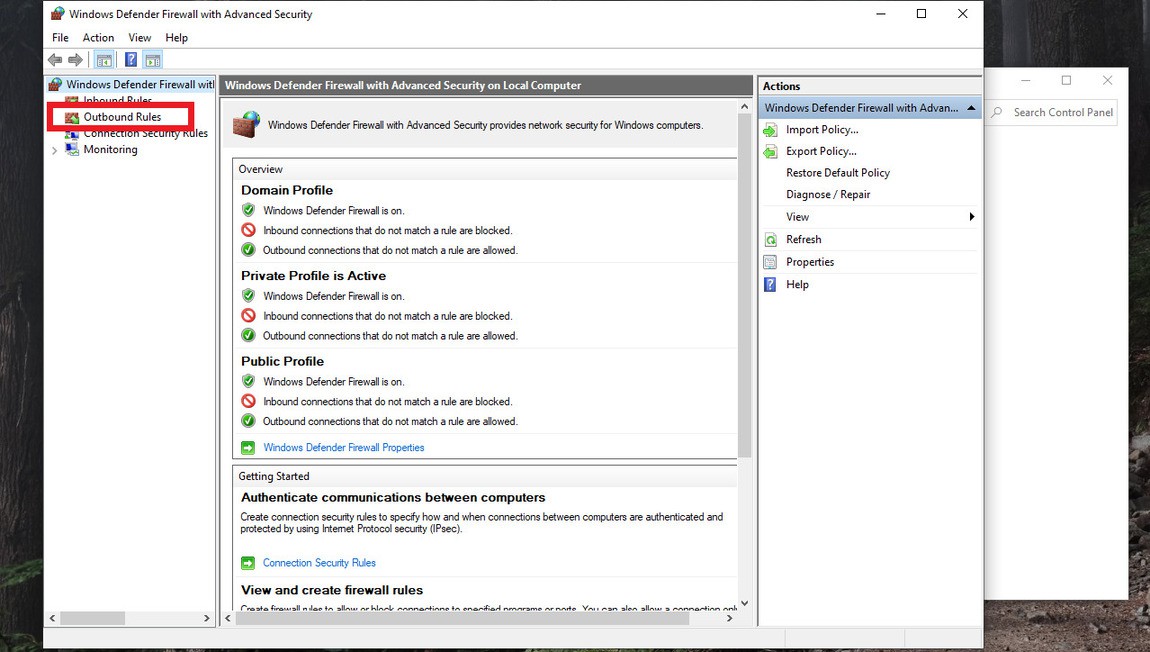
It will open the Advanced Security app. On the left side of the screen, you will find Outbound Rules under Windows Defender Firewall. Click on it.
-
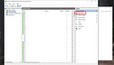
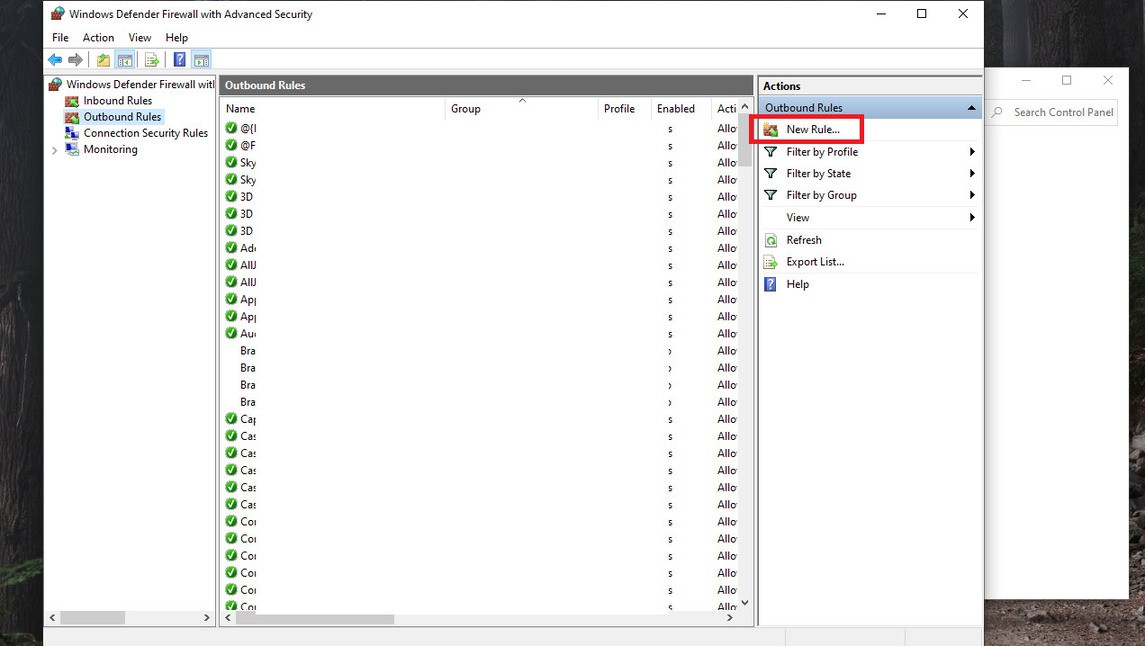
The Outbound Rules show a list of existing outbound firewall rules in the middle pane. In addition, you will see that your Windows 10 PC already contains dozens and dozens of Outbound Rules. Subsequently, find New Rule under Outbound Rules. Tap on it to create a new rule and to block an application from accessing the internet.
-
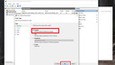
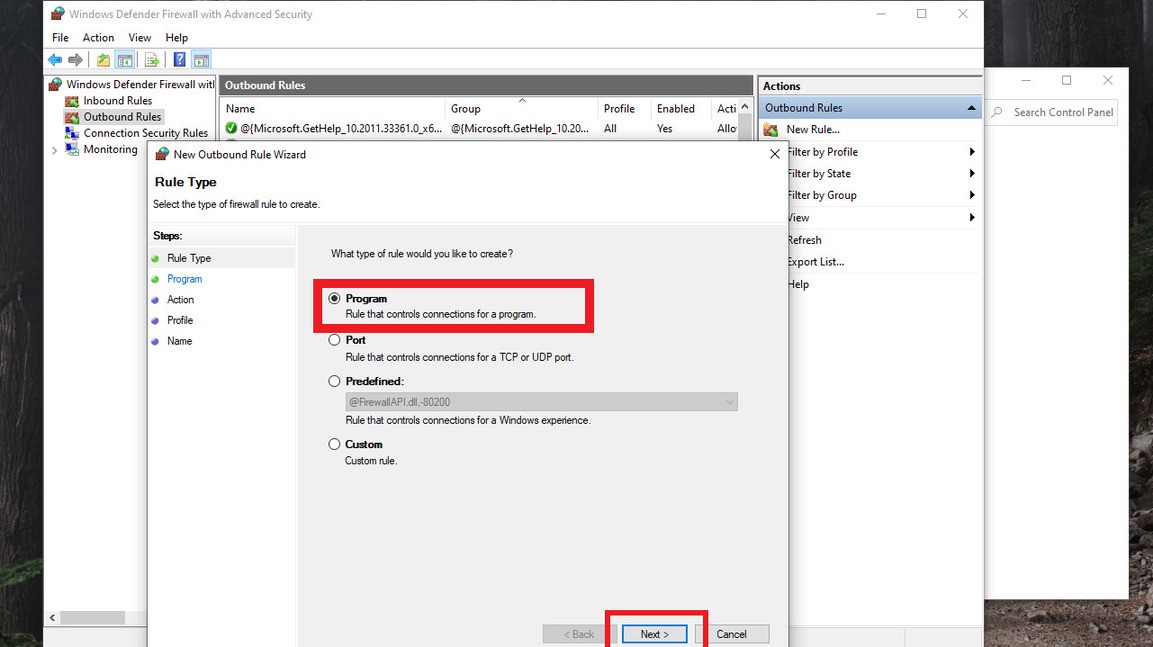
The New Outbound Rule Wizard will open with four options in the middle. Select Program among the four options and click on Next.
-
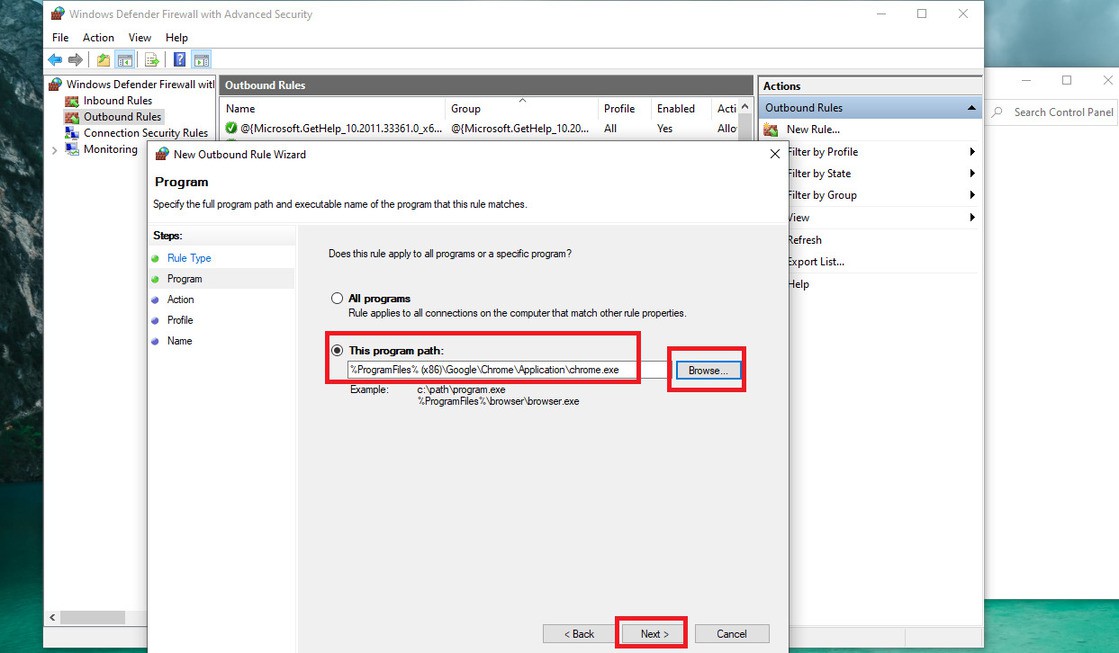
Under This program path, you will see an edit bar and a Browse button beside it. Click on the Browse button and select the application you want to block. Or if you know the path of the program, type it in the edit box. For the purpose of this tutorial, I selected Google Chrome Web Browser.

-
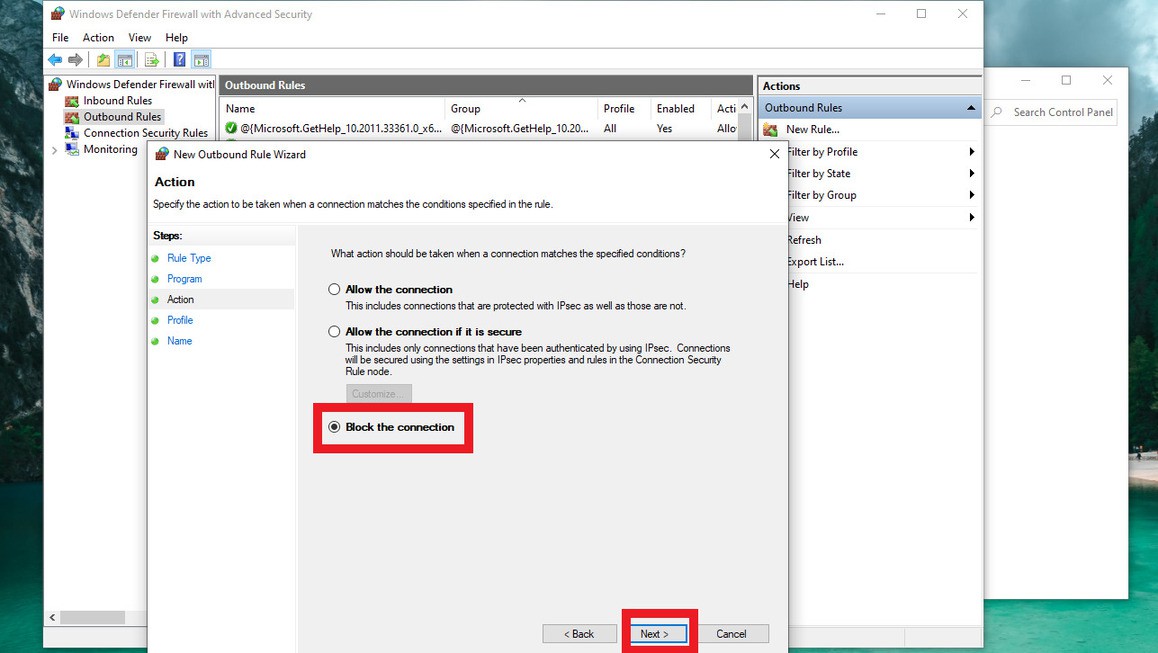
On the Action screen of wizard three options will appear. Select Block the Connection out of the options to block a program.
-
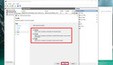
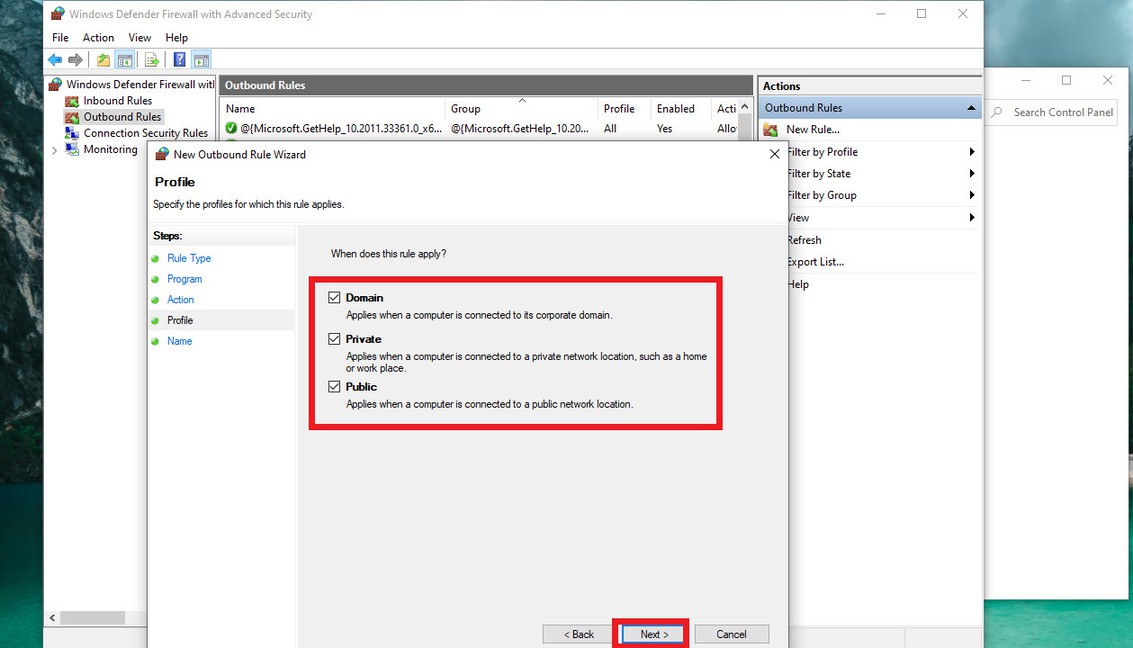
Consequently, you will be asked, “When does this rule apply?”. Here you will see three options. Select Domain, Private and Public if not selected already to block a program in Firewall across all network. Then, click Next.
-
Domain: When a computer is connected to its corporate domain.
-
Private: When a computer is connected to a private network location.
-
Public: When a computer is connected to a public network.
-
-
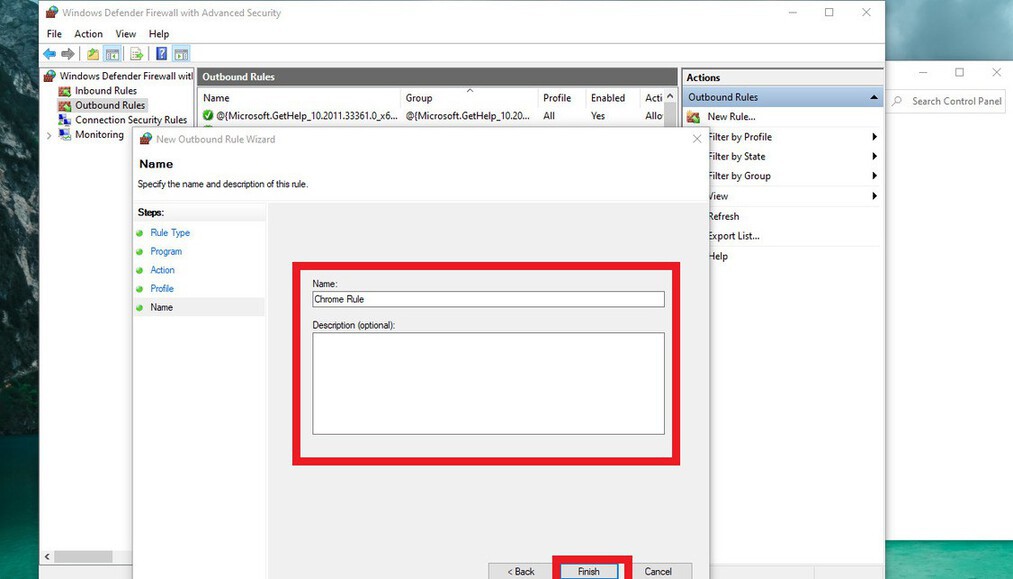
Finally, name the rule so that you can recognize it in the future and add a description if you want. Fill in the appropriate information and click Finish.
As a result, you will see that your new rule is at the top of the Outbound Rules. You were successful to block an application from accessing the internet in Windows 10.