Whether you are a gamer who wants to capture the adventurous and thrilling moments of your games or a video creator who wants to create the best tutorial videos for viewers, all you need is a screen recorder that can capture your work. Xbox Game Bar is a decent screen recorder from Microsoft that comes pre-installed on your windows but as the name suggests, it is useful in recording only games and some other apps.
In this article, we have curated a step-by-step guide for using Xbox Game Bar to recordyour apps, and moving on further we have added another method to record your desktop screen by using OBS Studio which is an open-source and free-to-use screen recording software. You can use both of them to record various contentsin Windows 10 and 11.
Note: The below methods will also work in other Windows variants like Windows 8 and Windows 7.
Contents [hide]
How to Record Screen in Windows 10 and 11
Recording Screen in Windows Using Xbox Game Bar
-
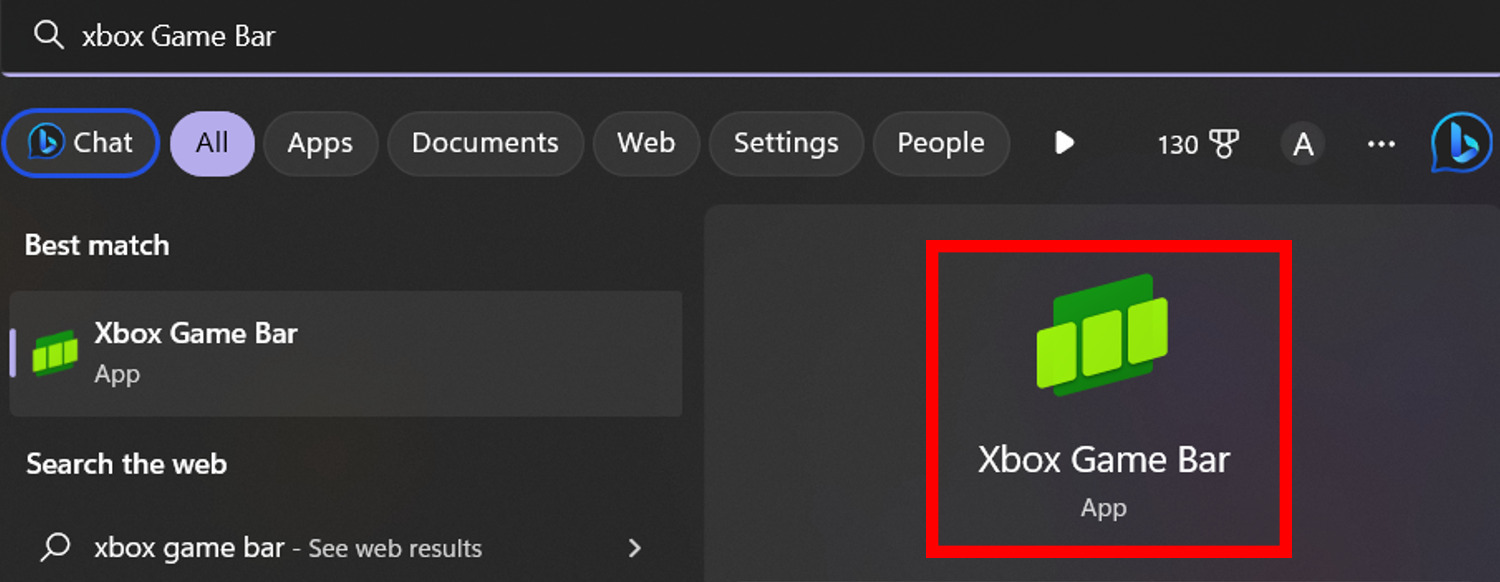
Make sure that you have Xbox Game Bar installed on your desktop and if not, download it from here.

-
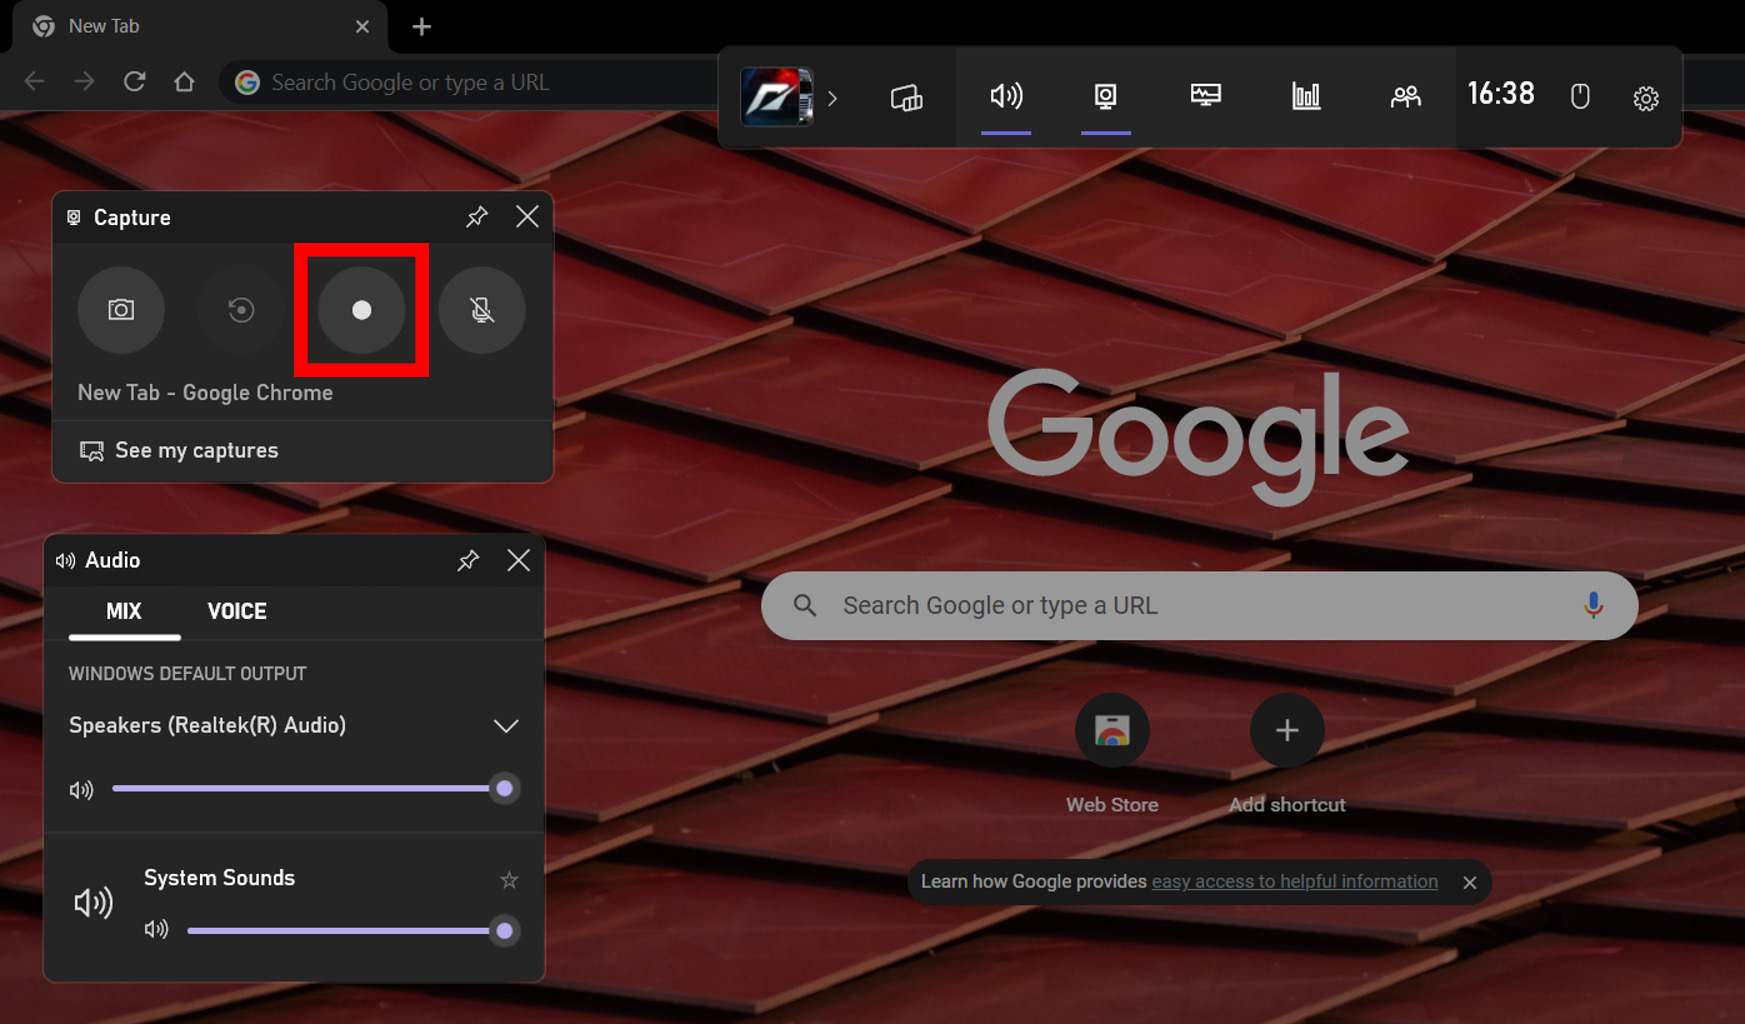
Now it’s important to note that the Xbox Game Bar cannot record Windows Desktop and File Explorer . It can only record games and other applications like Chrome. So to try it, open the Chrome browser and then press
Win+Gto open Xbox Game Bar. Different overlays will appear on your screen like Capture, Audio, etc. where you can configure volume and other settings. Now click on the record icon to start recording. You can also use the shortcut keyWin+Alt+Rto start and stop recording .

-
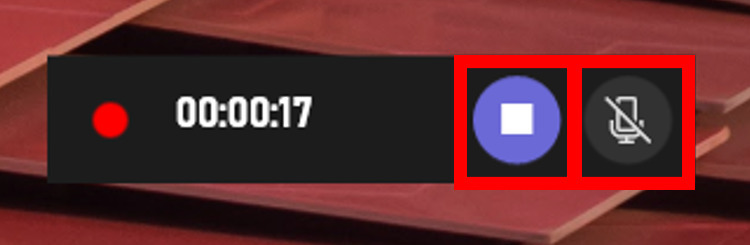
While recording Chrome browser, a small overlay will be appearing on your desktop screen from where you can stop recording and mute/unmute your microphone.

-
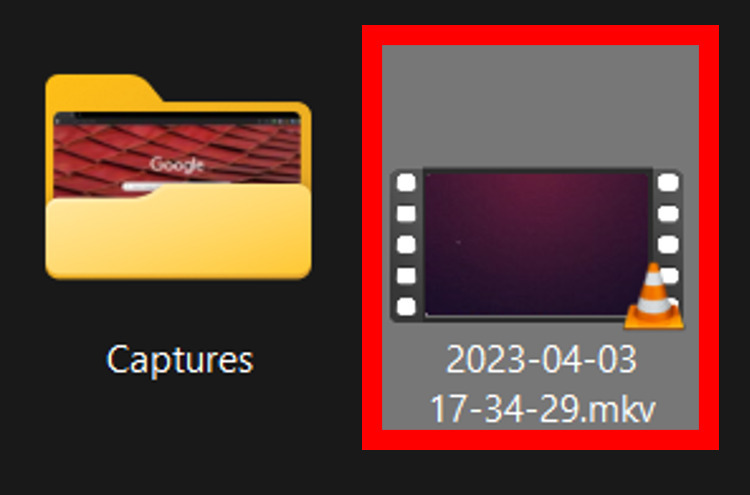
To locate your saved recording, navigate to Videos and then open thefolder named Captures where you will find all your Xbox Game Bar saved recordings.


Recording Screen in Windows Using OBS Studio
-
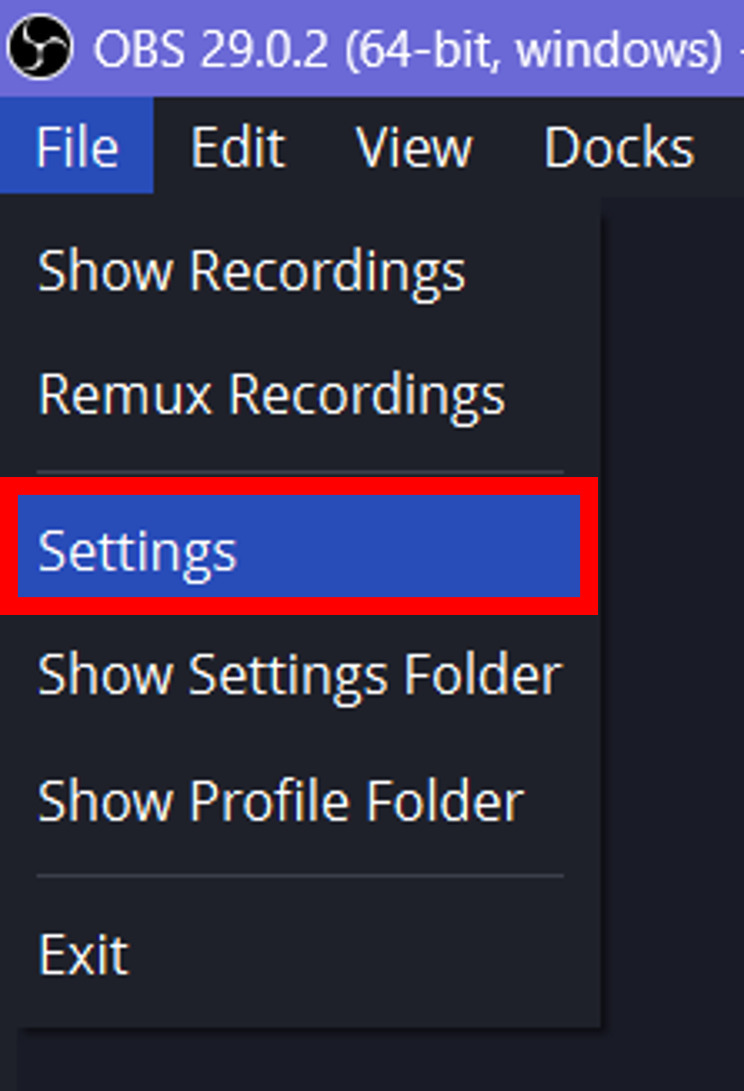
Download OBS Studio from here and install it on your desktop. After finishing the installation, open it and click on File at the top right corner and then click Settings.

-
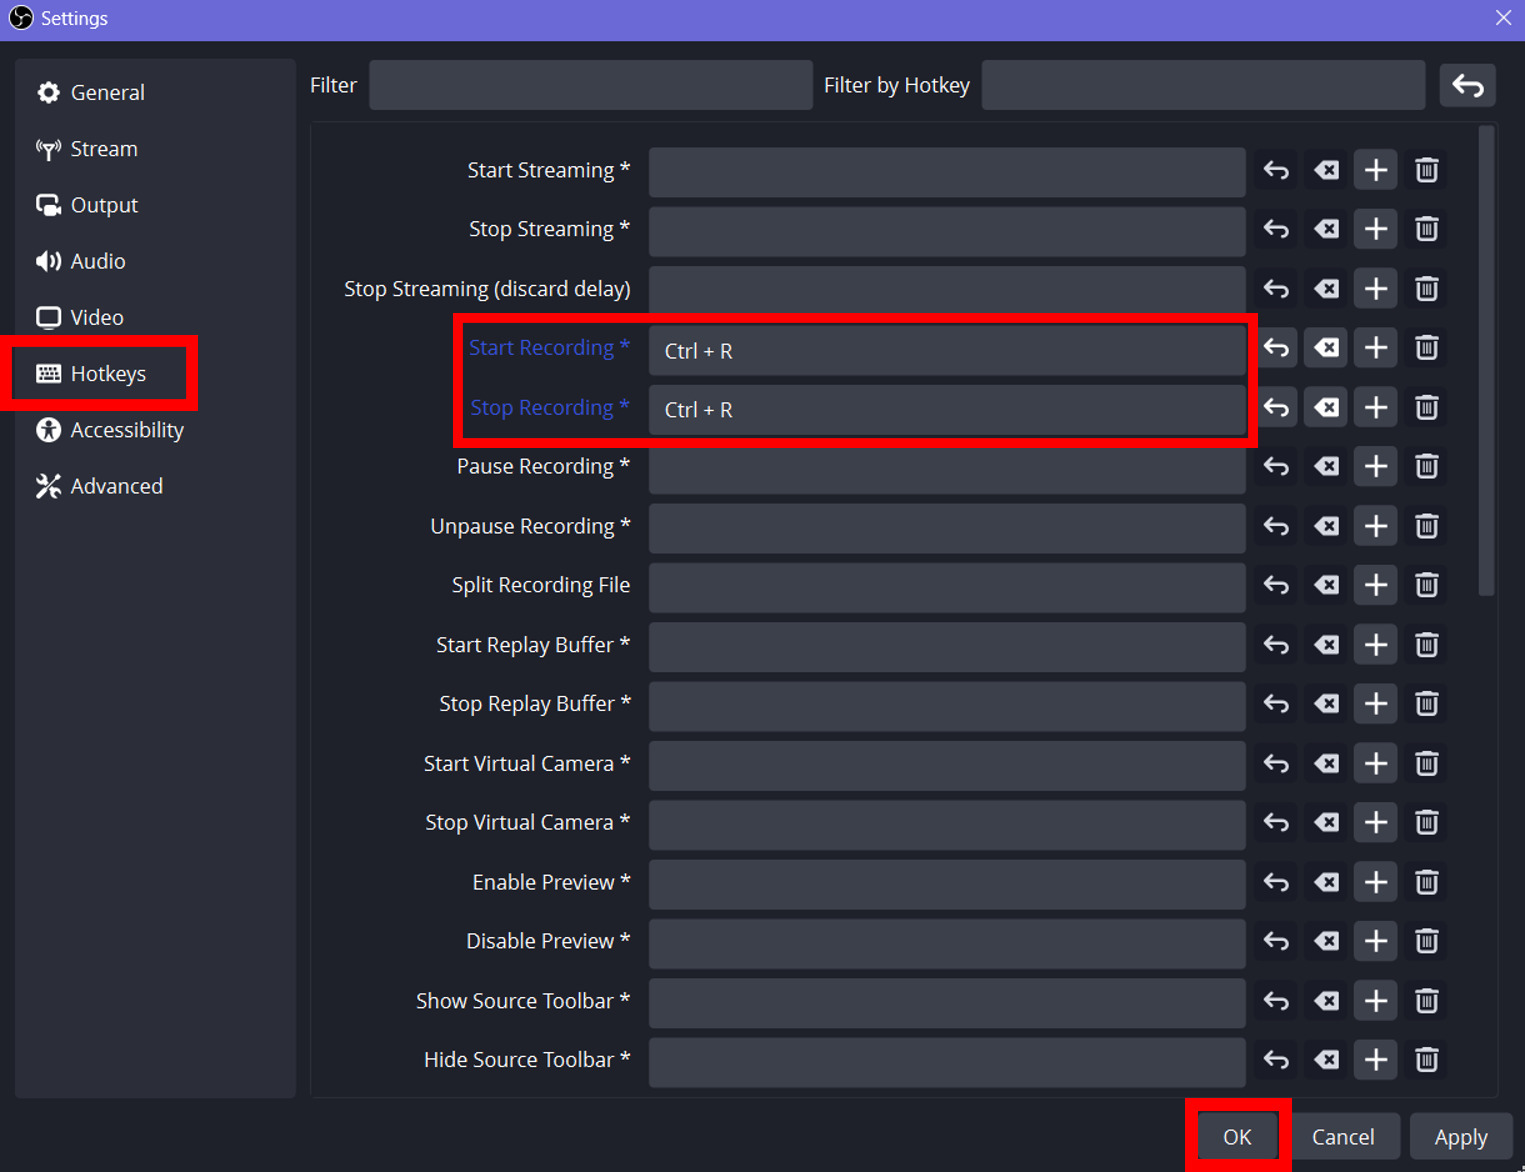
In the settings menu click on Hotkeys. Here you can set the shortcut keys for various functions. For now, set the hotkeys for Start Recording and Stop Recording functions to Ctrl+R and then click OK.

-
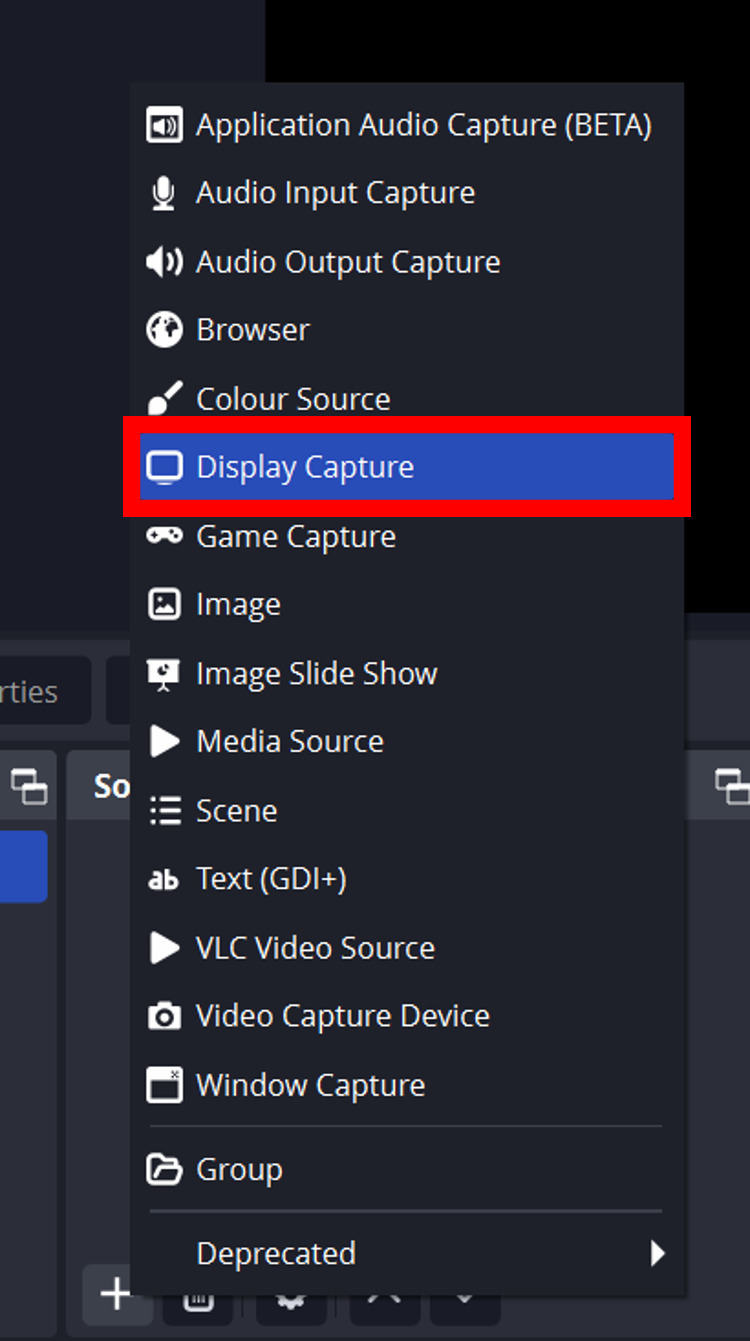
Now click on the plus icon in Sources.

-
Select the source of capture. For now, we have selected Display Capture as we want to record the windows desktop screen.

-
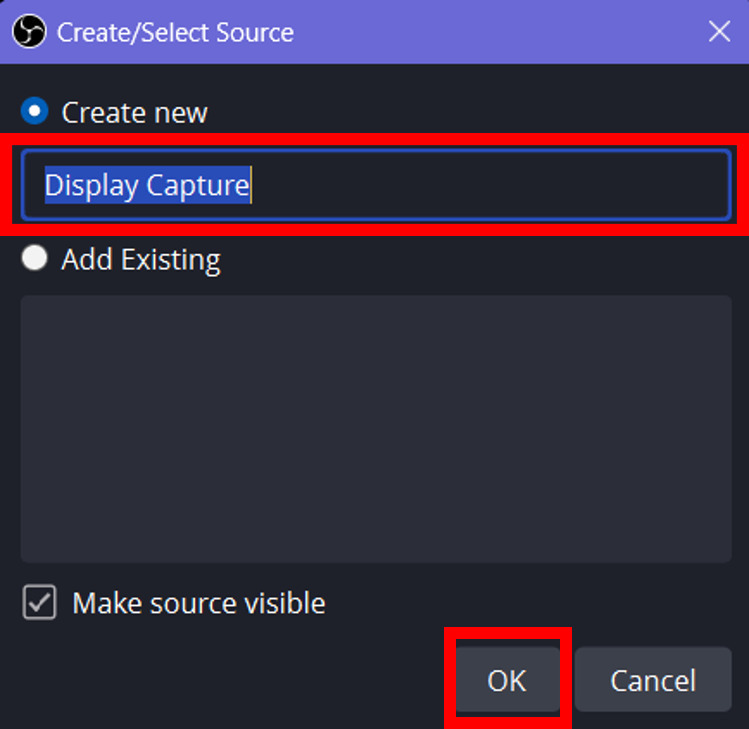
Under Create new, give a name to your selected capture source, and then click OK.

-
Now mark the Capture Cursor if you want your mouse cursor to be visible in the recordings and then click OK.

-
Minimize the OBS Studio application and then press
Ctrl+Rto start recording your desktop screen. To stop the recording press the same. -
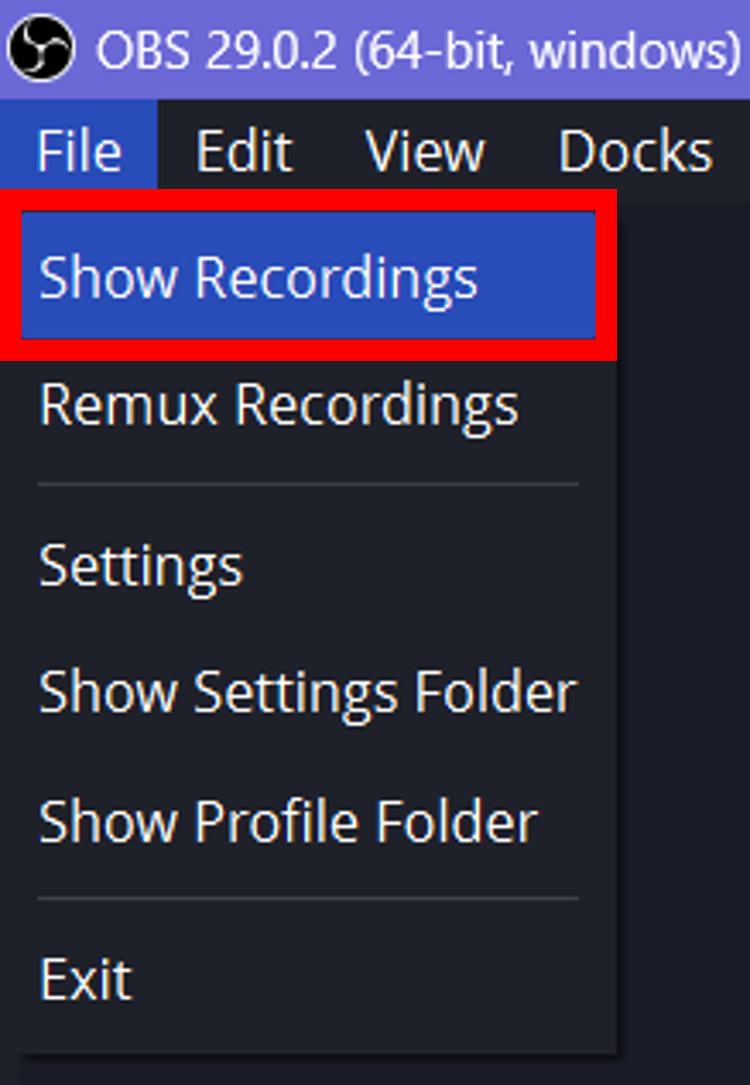
Your screen recording has now been saved. To locate it, maximize the OBS Studio and click on File and then click onShow Recordings.

-
A folder will open where will find your recorded video. By default, it is in the Videos library.