
As children are becoming more and more tech-savvy, parents are worried about their exposure to some harmful and inappropriate content. However, you can create a safer environment for your children on your PC by setting up a child account on your Windows 10 PC or Laptop. Windows 10 introduced a feature to add a child account so that children can use the computer in a safer environment and consecutively parents can monitor their kid’s activities. You can also limit the time they can spend in front of the computer.
So, in order to help you create a safer environment for your kids online, we have given a step-by-step guide on how to add a child’s account in Windows 10.
Add A Child Account In Windows 10
-
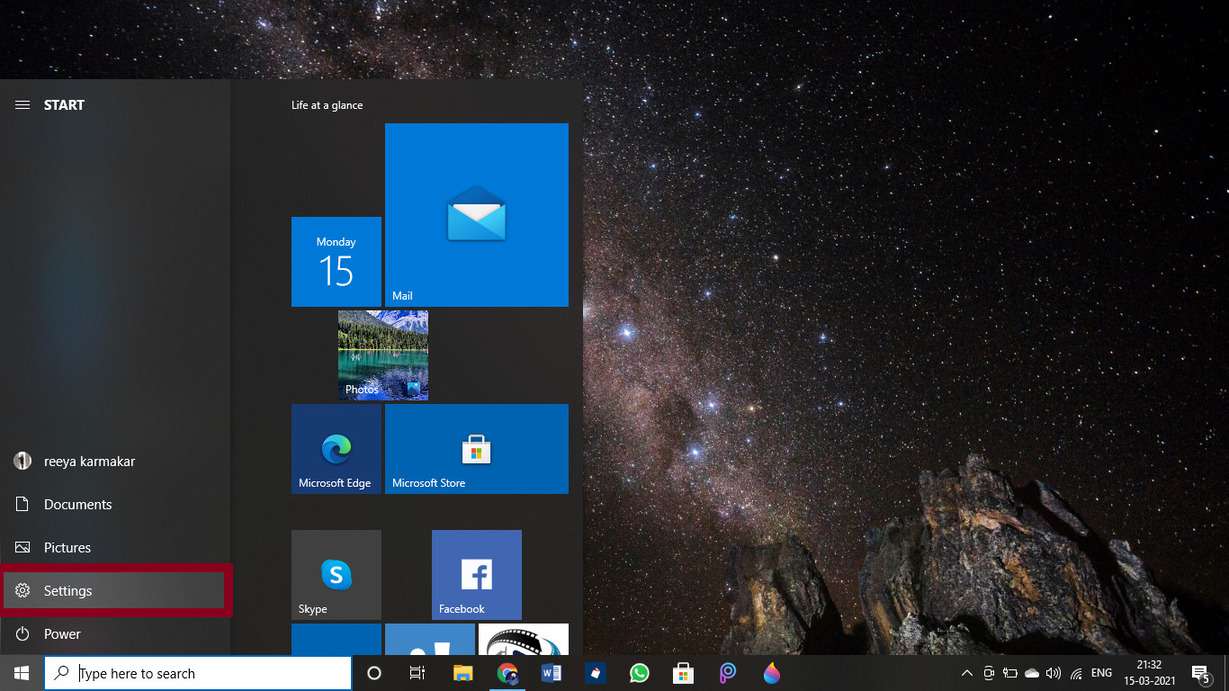
To add a child account in Windows 10, the first step is to open the Windows 10 setting. You can open it by clicking on the Windows icon which is on the bottom left corner and then select the
Settingsoptions.
-
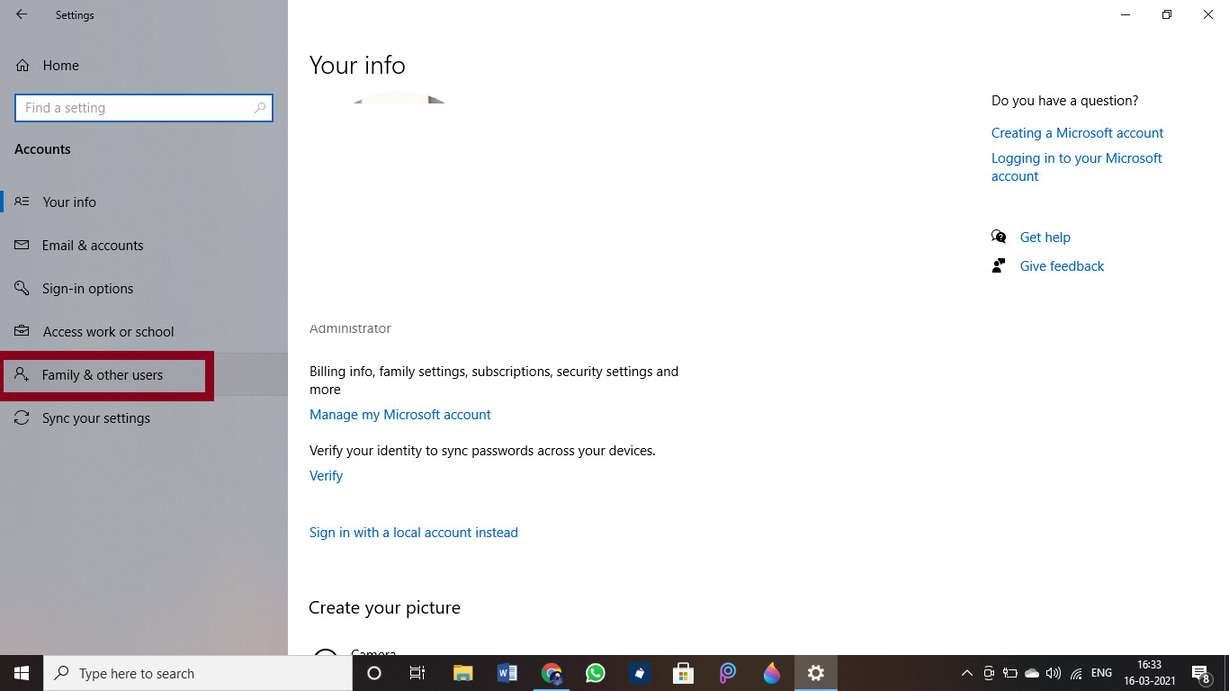
In the settings windows, Click on the
Accountssettings.

-
Next, in the
Accountsettings, click onFamily and other userspresent among other lists on the left side of the screen.
-
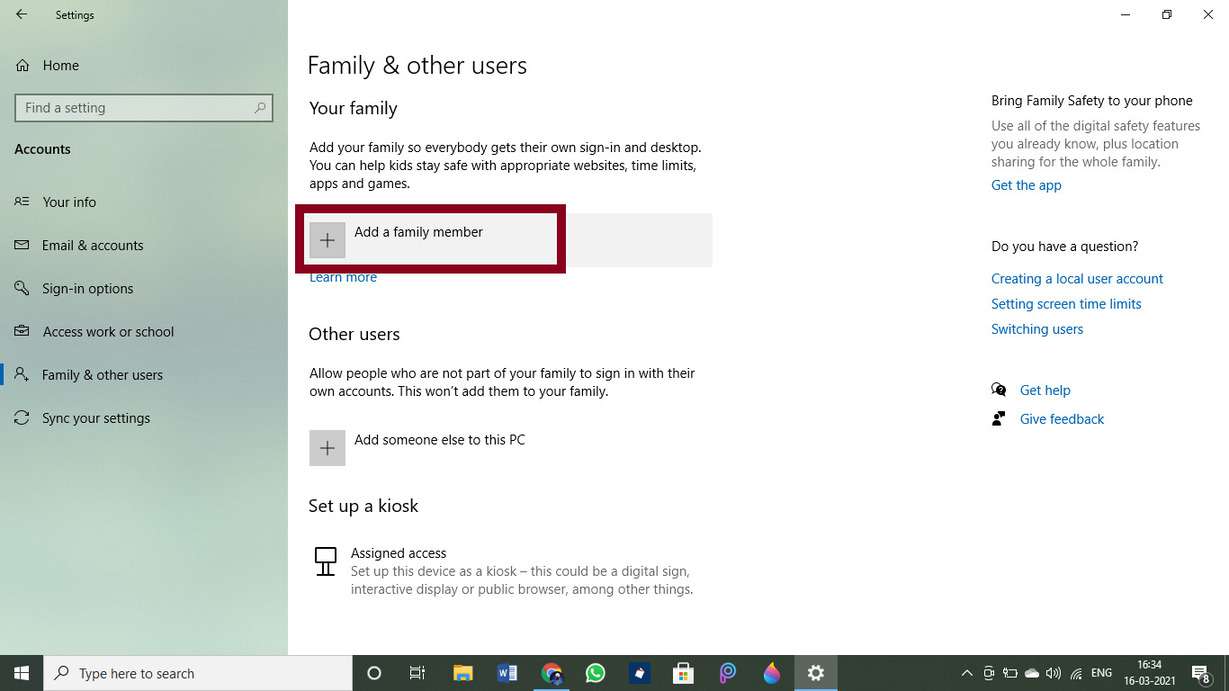
Under the Your family section you will find a plus() icon with
Add a family memberwritten beside it. Click on that icon.
-
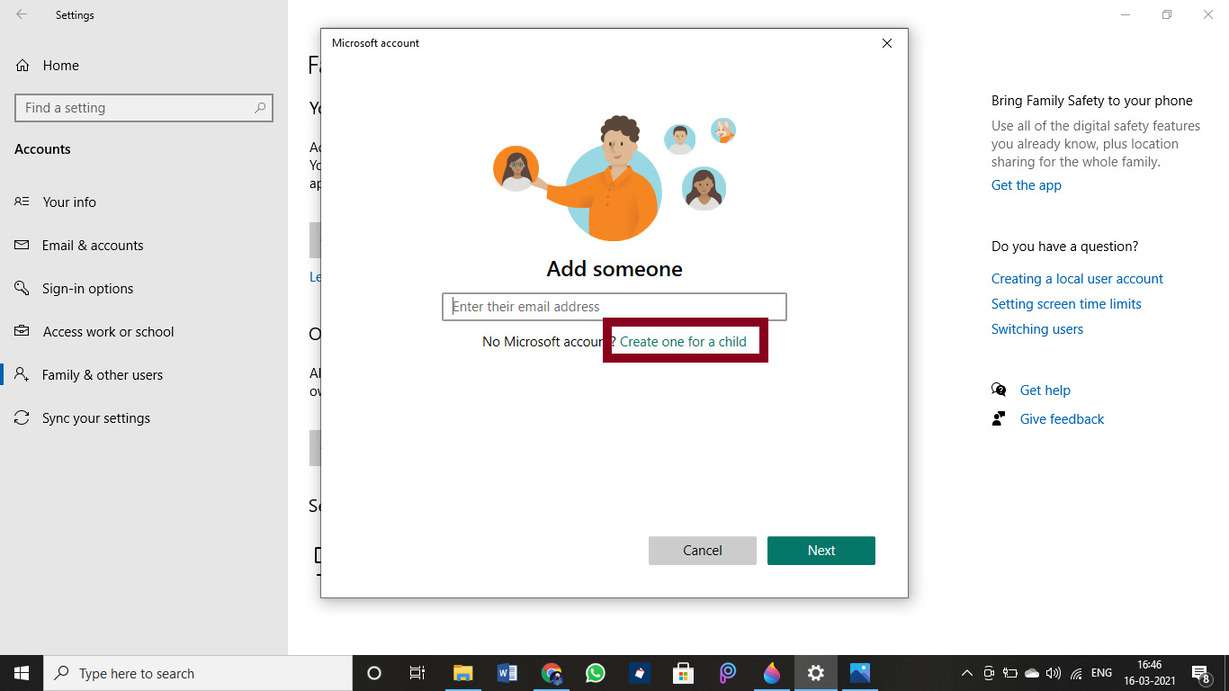
On clicking the plus icon a window will open. There you will have the option to add a child account. If you do not have a child account then click on
Create one for a child.
-
In order to add a child account, create one by adding a
new email and password.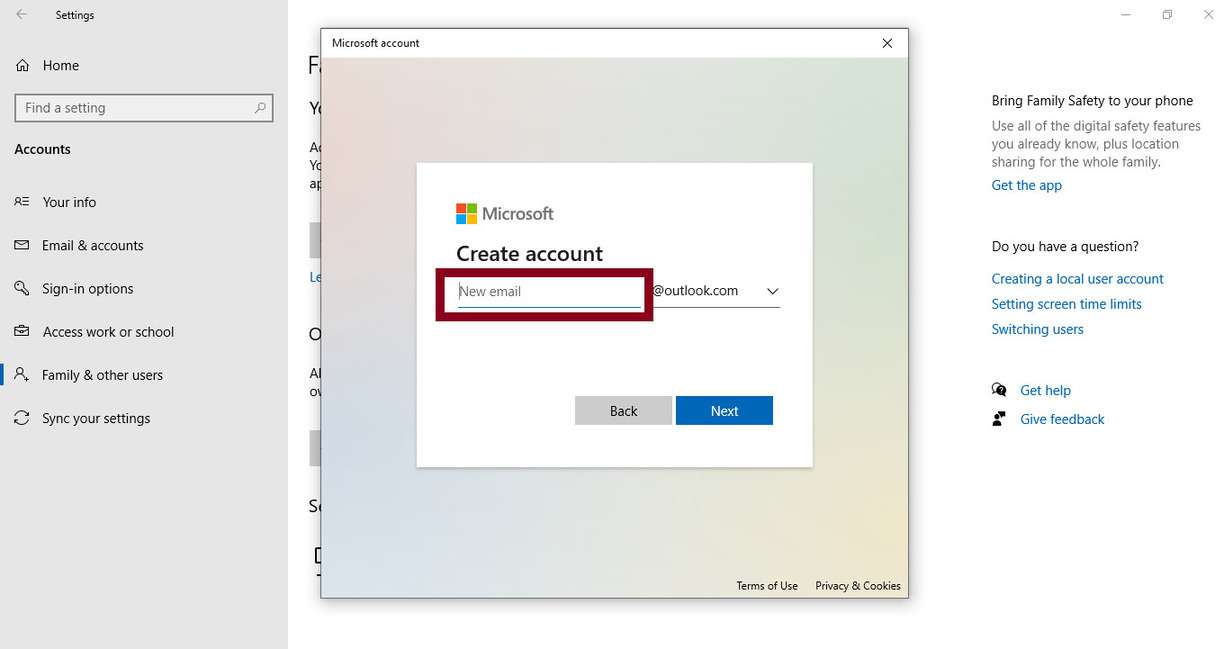
-
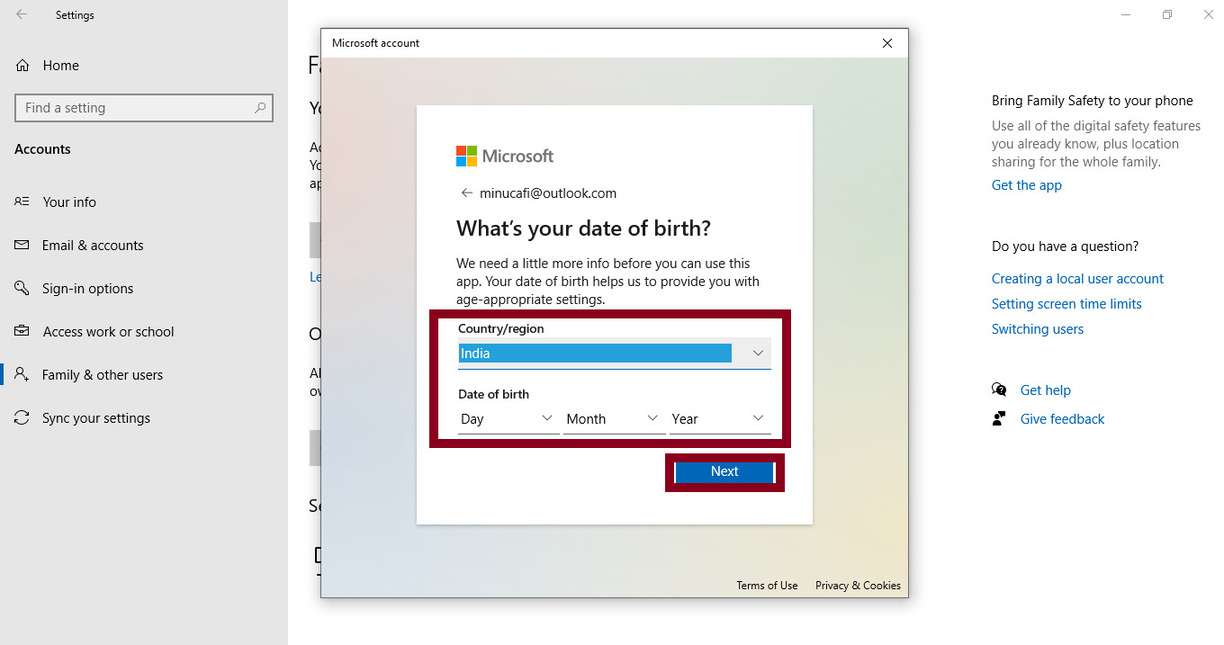
Windows 10 will also ask you for information such as your child’s name and age to provide you with age-appropriate content. Complete these necessary steps. Then, click on
Nextbutton.
-
You have successfully added a child account to your Windows 10 PC. This account is a standard account with limited access and the newly added member will be able to sign-in immediately. However, until the child account does not accept your invitation you won’t be able to control your account.

Now you have to accept the invitation from your child account. Once you or your child accept the invitation, you are able to control your child’s account.
Related Article: Easyfone Star Review- India’s First Kids Phone
Accept Invitation From Child Windows 10 Account
-
To accept your invitation, the first step is to click on the Start menu. You will see your Microsoft profile picture in the extreme left of the screen. Click on that.

-
There you will find the email address of your child’s account. Click on that email.

-
This will take you to the sign-in page. Click on the sign-in option and enter the password you created while creating your child account.
-
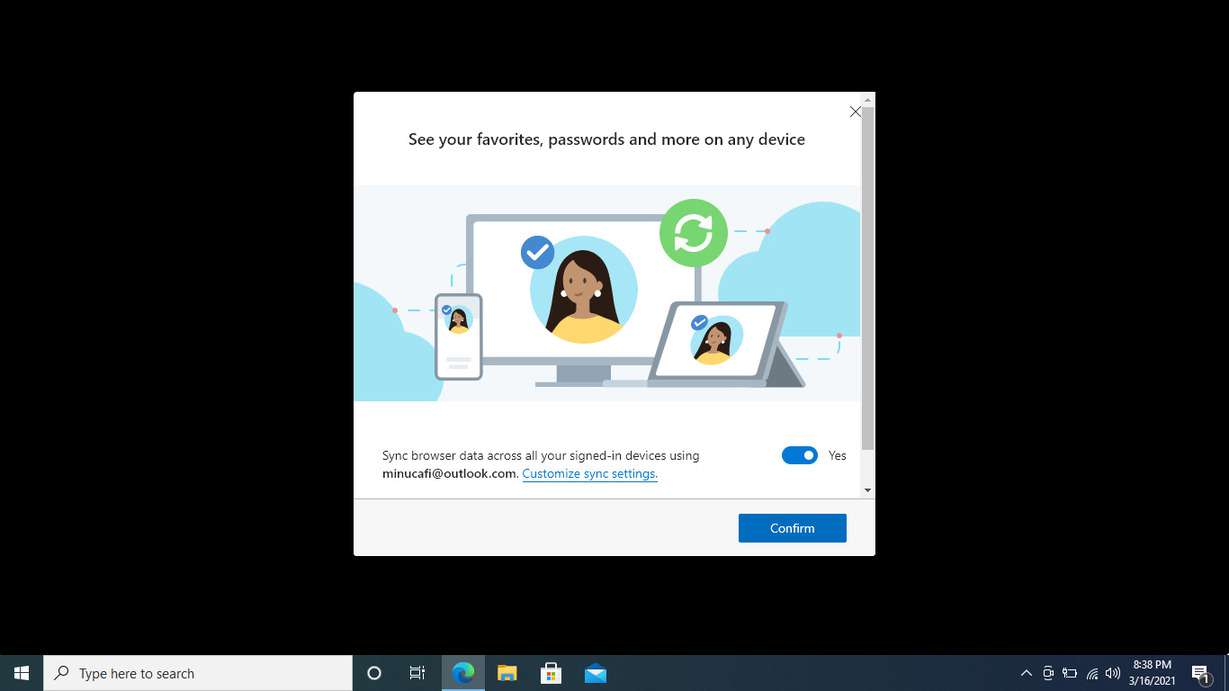
A window will appear that will ask you to sync your browser data across all of your signed-in devices. Click on Confirm
-
Then, click the next button and create a new pin for this newly created account and click on OK.
-
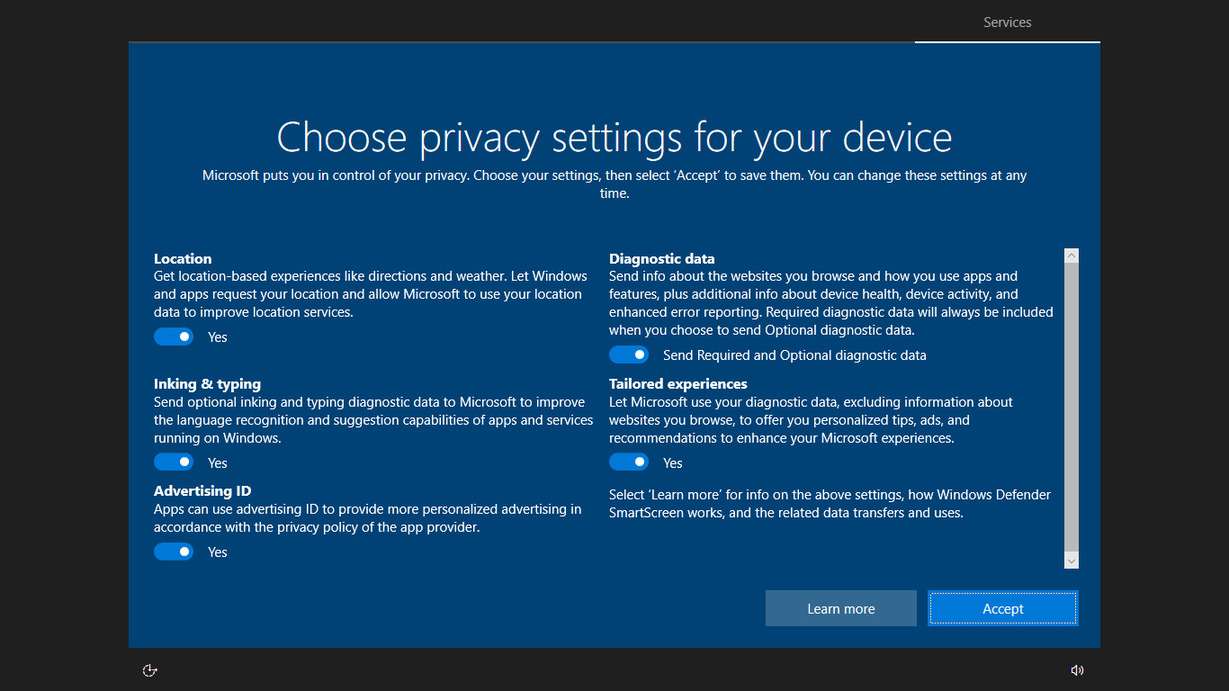
Choose privacy settings for this new Windows 10 account by switching the toggle on and off and click on Accept.
Yeah, you have successfully added your child account on your Windows 10 PC. Now you can easily control your child’s actions, find your child’s location, restrict PC usage, monitor your child’s activity, and a lot more.