As the world of the internet continues to grow, new websites are added continuously to this digital landscape. Most websites today contain advertisements that make up a significant part of their revenue. While these ads are a source of income to them, for visitors, it can sometimes be a cause of irritation. Whether you are conducting research or reading an article, these ads can turn your pleasant browsing experience into a bad one.
Though there are various solutions to block ads, using a private DNS is one of the best ways. Some private DNS servers not only enhance website load time but also block adware, spyware, and malicious sites, thus making them a secure and efficient solution to block ads. In this article, you will find a detailed guide on how you can block ads on Android devices by connecting to a private DNS server.
Contents [hide]
Configuring Private DNS On Android Settings
-
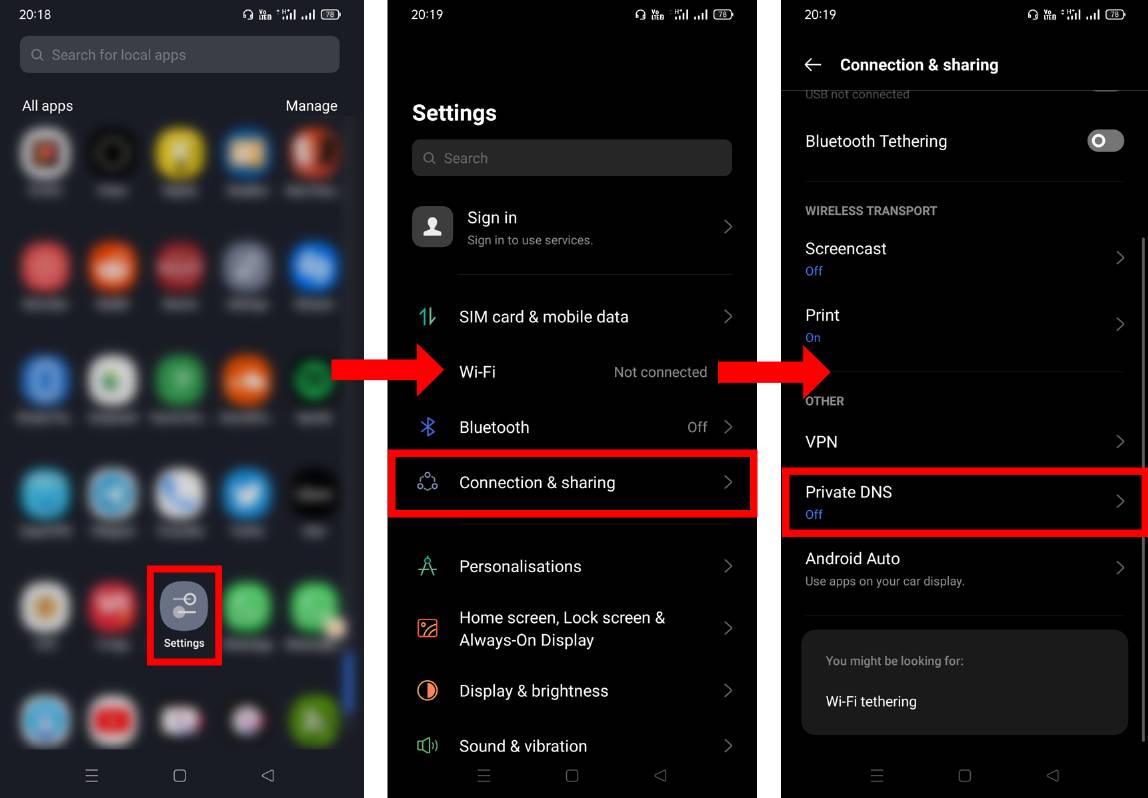
Open your Android phone
Settingsand toConnection & Sharing > Private DNS
-
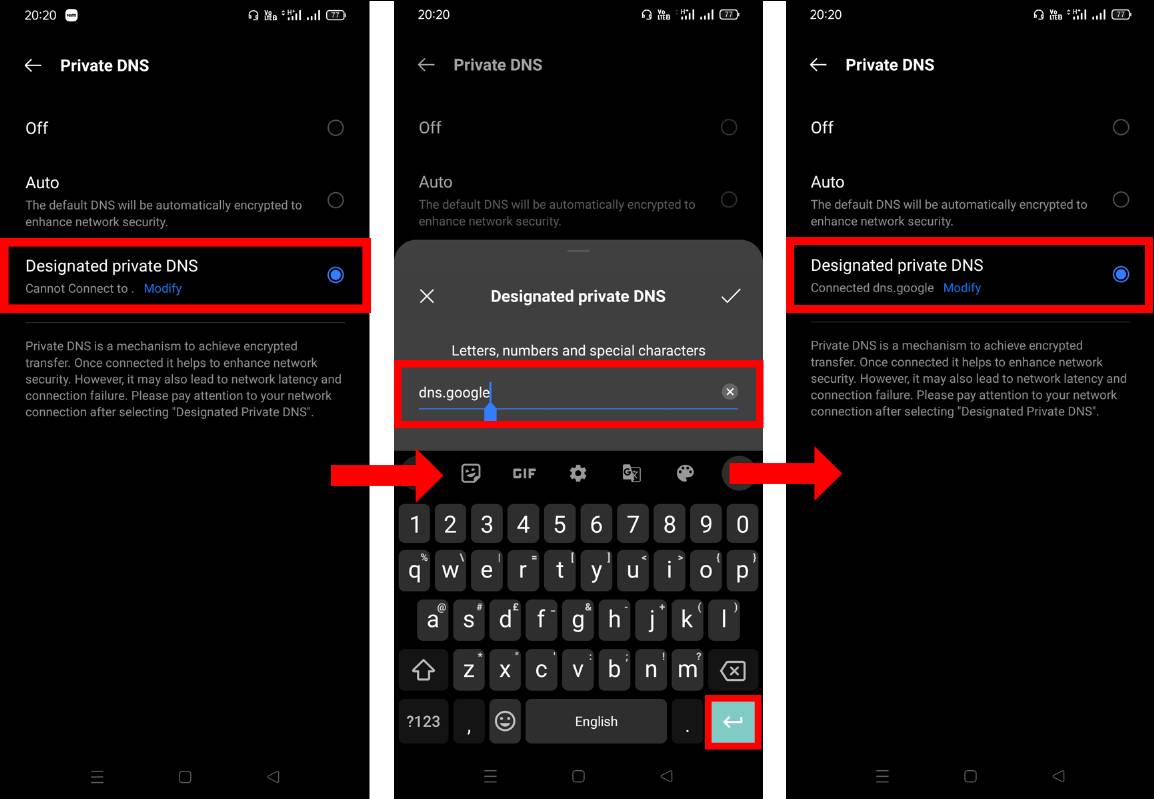
Under private DNS settings, select the
Designated private DNSoption and click onModify. -
Next Type the Private DNS address of your choice to block the ads on your Android device of yours and then click on the
Tickmark. Following are some of the best and most popular DNS domains that block adware effectively:
i. dns.quad9.net
ii. 5eee95.dns.nextdns.io
iii. dns.adguard.com
iv. dns.decloudus.com
v. p2.freedns.controld.com -
After establishing a successful connection to the designated private DNS, it will show
connected.

Configuring Private DNS On Android Using Third-Party App
Connecting to Prelisted DNS
-
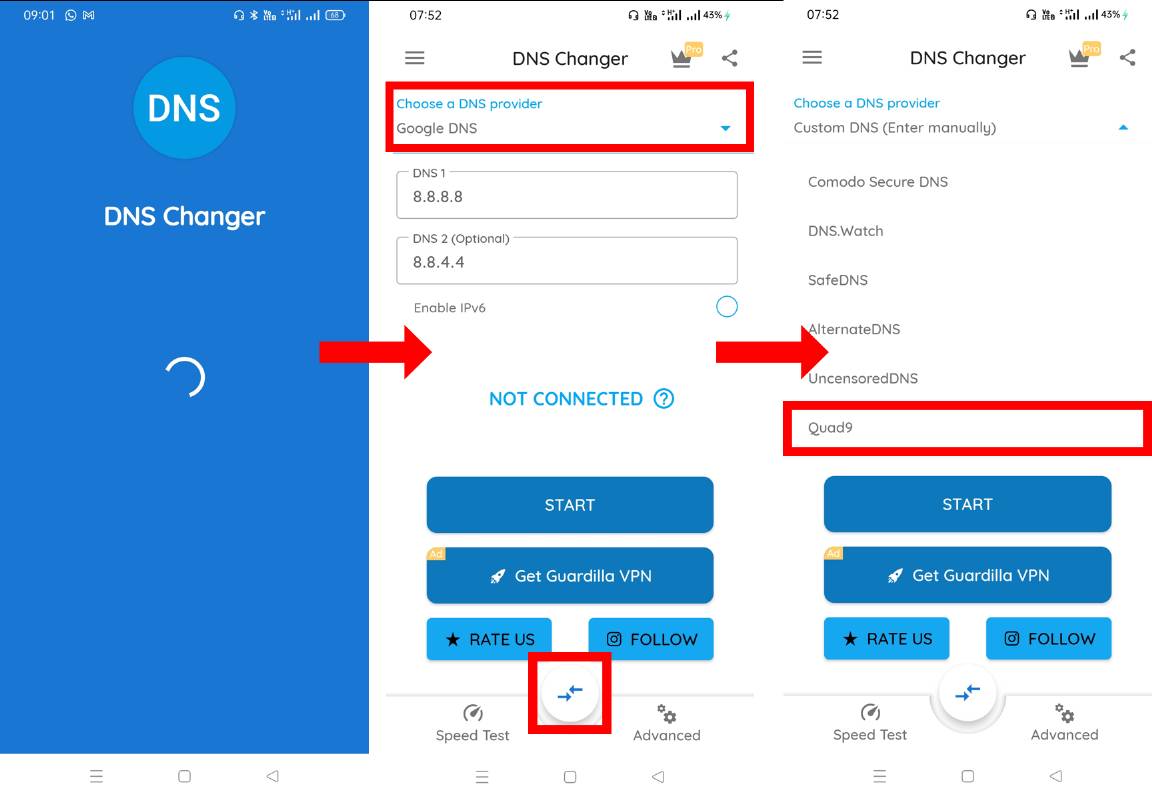
Download and open the DNS Changer app from the Google Play store.
-
Next, Open the DNS Changer App and select the private DNS server of your choice. Here we have selected the Quad9 DNS server fro the demo to block ads on Android devices.

-
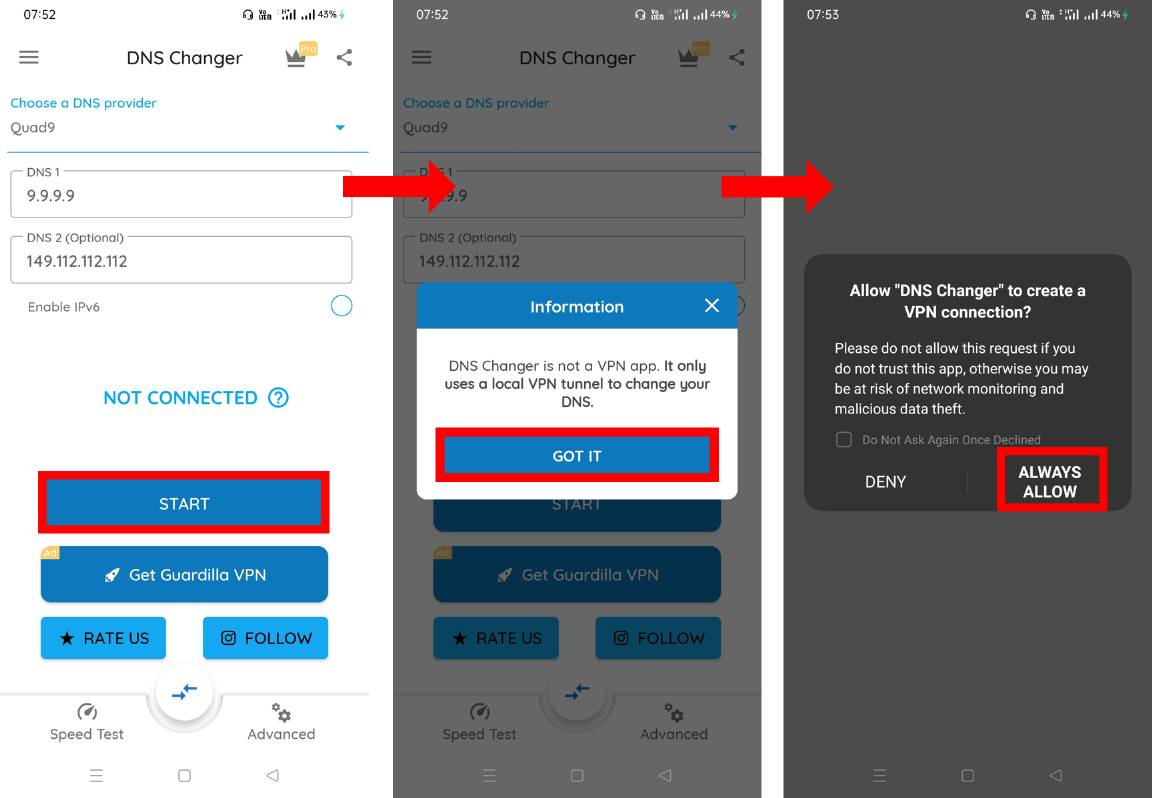
Now, click on the Start button to change your DNS server. Click on the ALWAYS ALLOW option to allow the DNS Changer app to establish a VPN connection that will be used to change DNS. After this, you will be connected to a private DNS server.

Connecting to Custom DNS
-
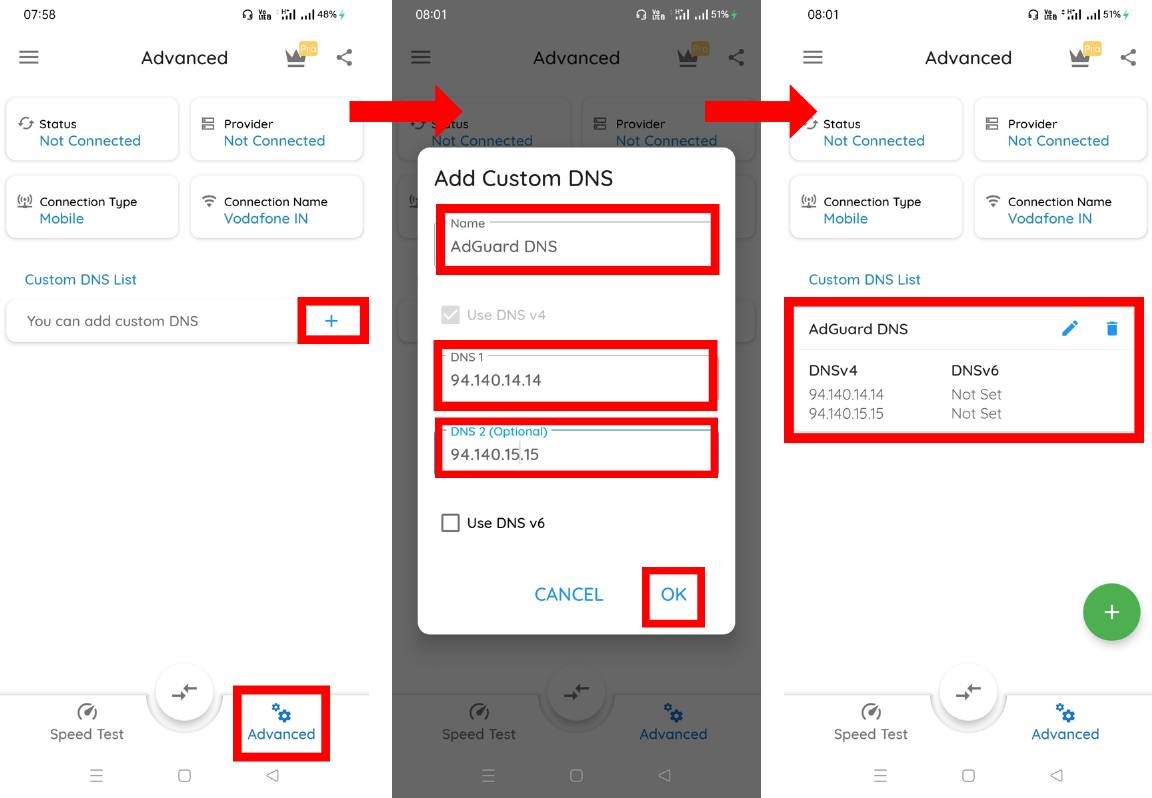
To add a custom DNS, go to the
Advancedsection of the DNS Changer app and click on theaddicon. -
Next, enter the Name and
IP address(es)of your custom DNS server and hitOK. -
Now you will see that your custom private DNS server is added to the list.

-
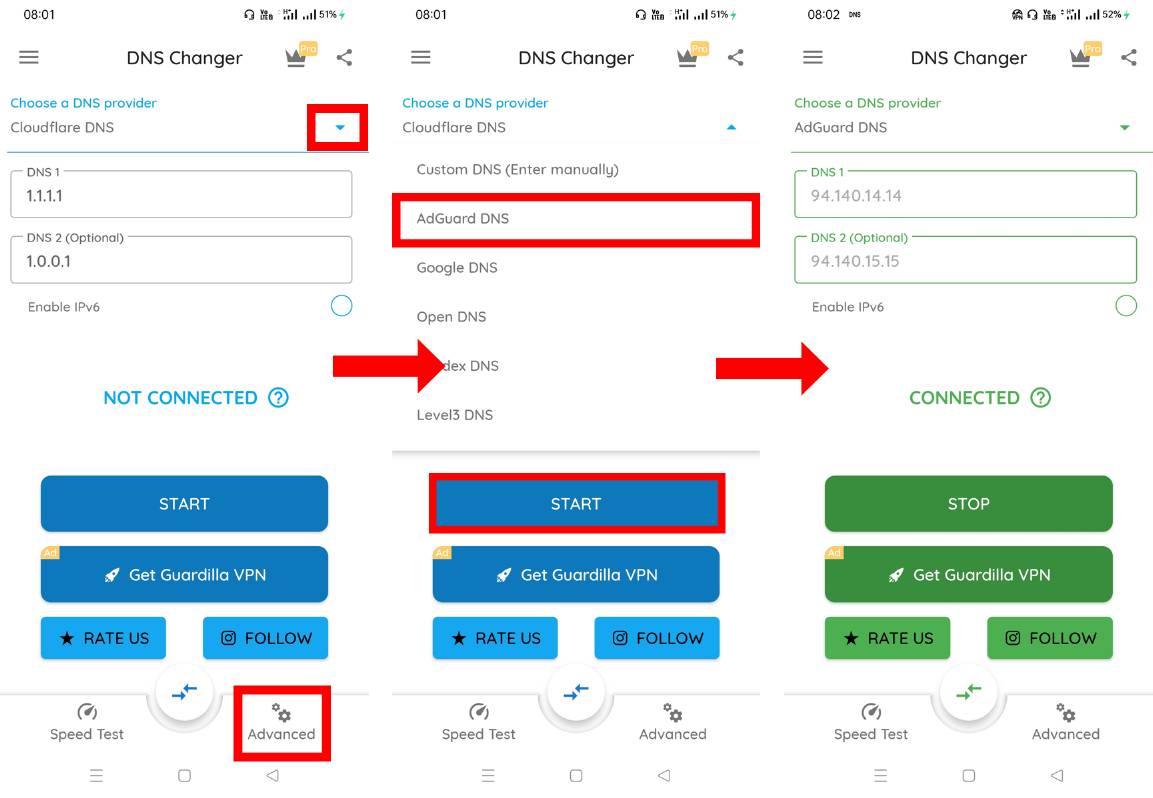
After adding your custom DNS, go to the DNS Changer section and select the DNS that you have added and then click on
Start. -
On a successful connection, the app will show you a connected sign with a notification.

Private DNS Ad-block Test
For checking whether your private DNS server is blocking ads correctly or not, you can try the Toolz Adblock Test link by visiting the given link using Chrome or any other browser.
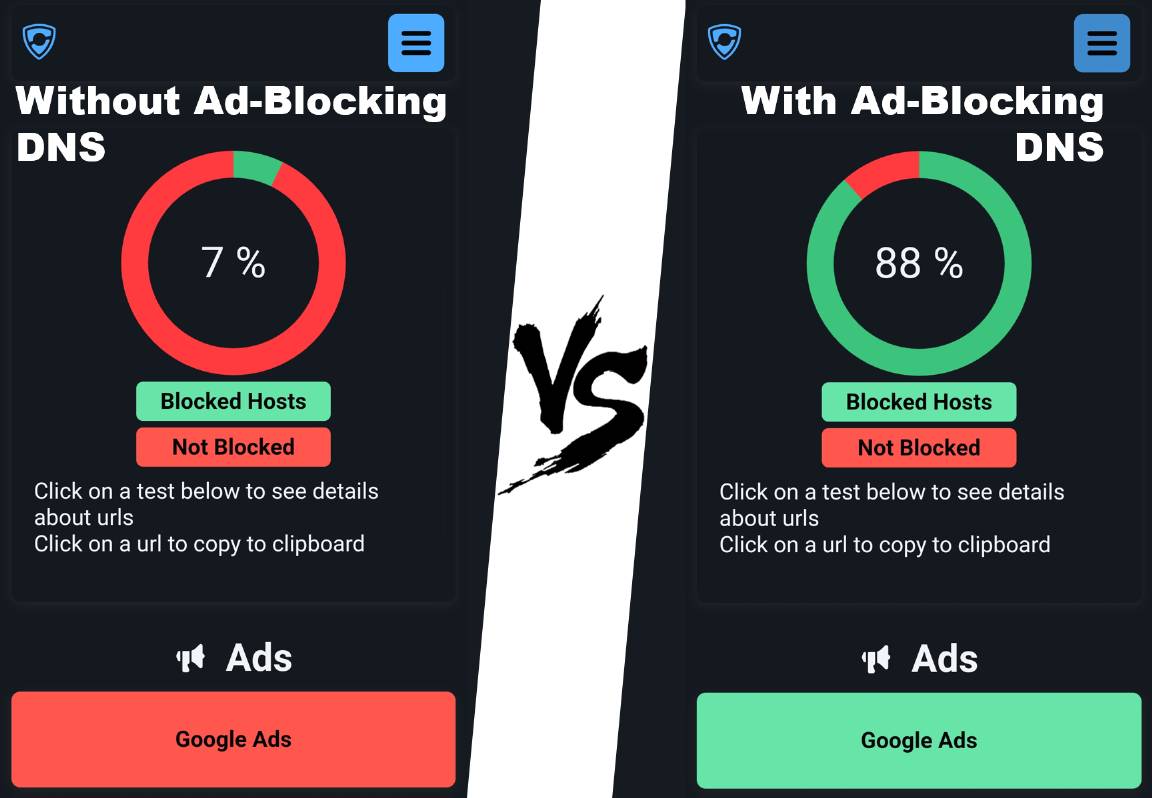
To give you an idea of how a private DNS server block ads on Android devices effectively, we have tried the Adblock test, and have put the screenshots of the outcome in the followingimage.
