DNS (Domain Name System) helps us browse the internet with ease by translating long numerical IP addresses of websites into easy-to-remember domain names. Using private or custom DNS servers is very common nowadays, as they provide good security and load websites faster. Whenever we browse the internet, our system locally stores the DNS lookups as DNS cache which helps us to load the website faster.
However, there are times when this useful DNS caching becomes problematic as sometimes outdated and incorrect information gets stored which leads to the inaccessibility of websites and slow network speed. So to resolve this issue one must flus DNS cache from time to time. In this article, we will guide you on how you can clear DNS cache on your Android device.
Must read articles:
Contents [hide]
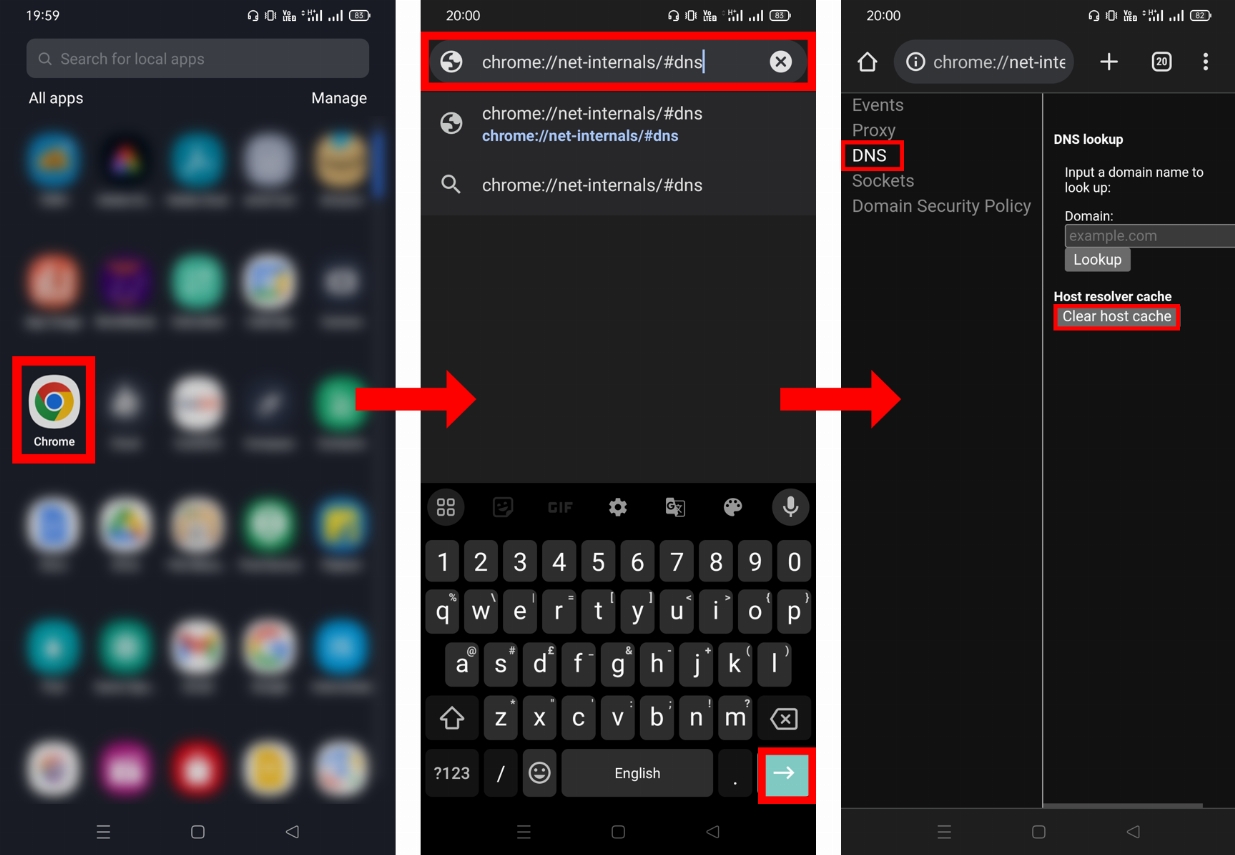
1. Clear DNS Cache on Google Chrome
-
Open the Google Chrome app on your Android device.
-
In the address bar type the following address
chrome://net-internals/#dnsand hit Enter. -
In the DNS section, click on
Clear host cacheand your DNS cache will be flushed. This method works for other browsers as well.

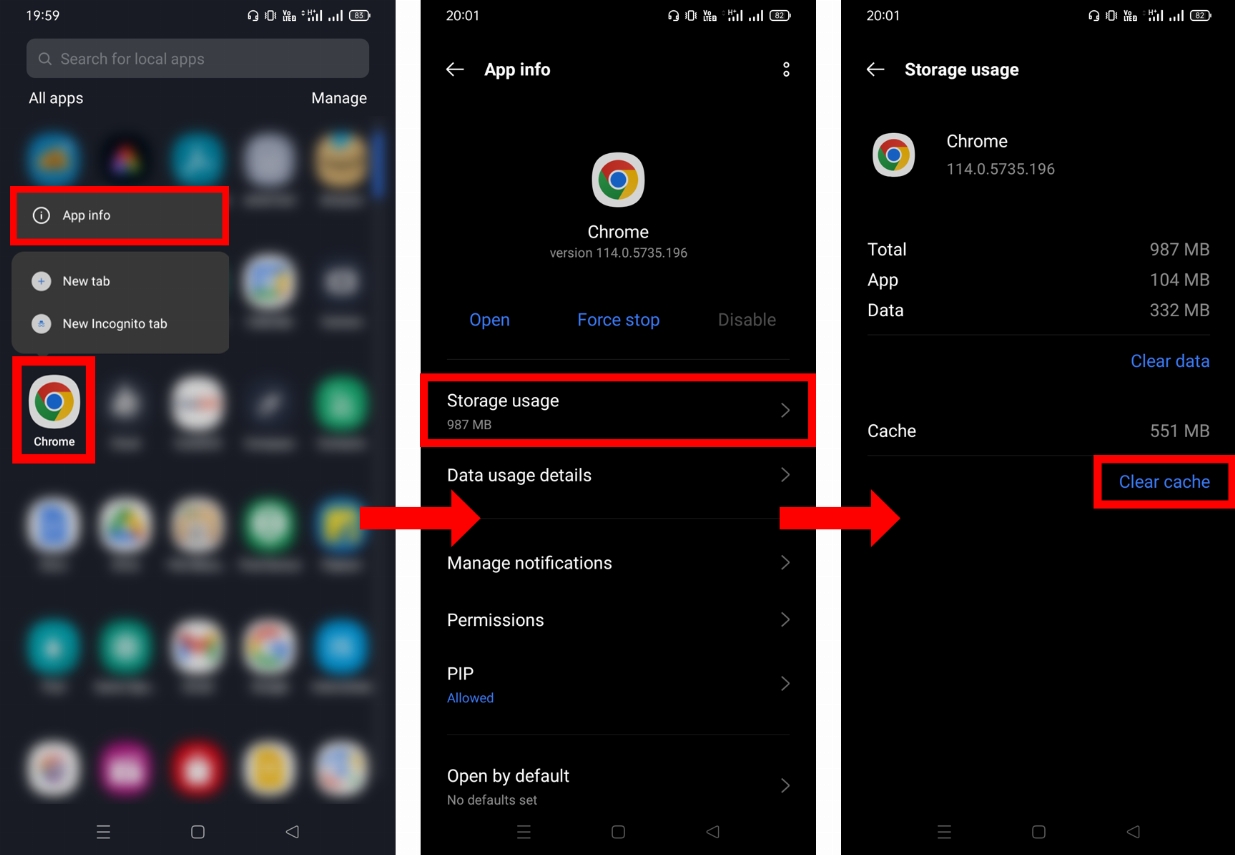
2. Clear DNS Cache from the App info
-
Click and hold Google Chrome or the browser you use and then select App info.
-
Now select Storage usage.
-
In the Cache section, you will be able to view the DNS cache and all the other cache of the app, so click on
Clear cacheto delete the DNS and other cache of your browser.

If you are still facing issues with your DNS or internet connectivity then try following DNS settings:
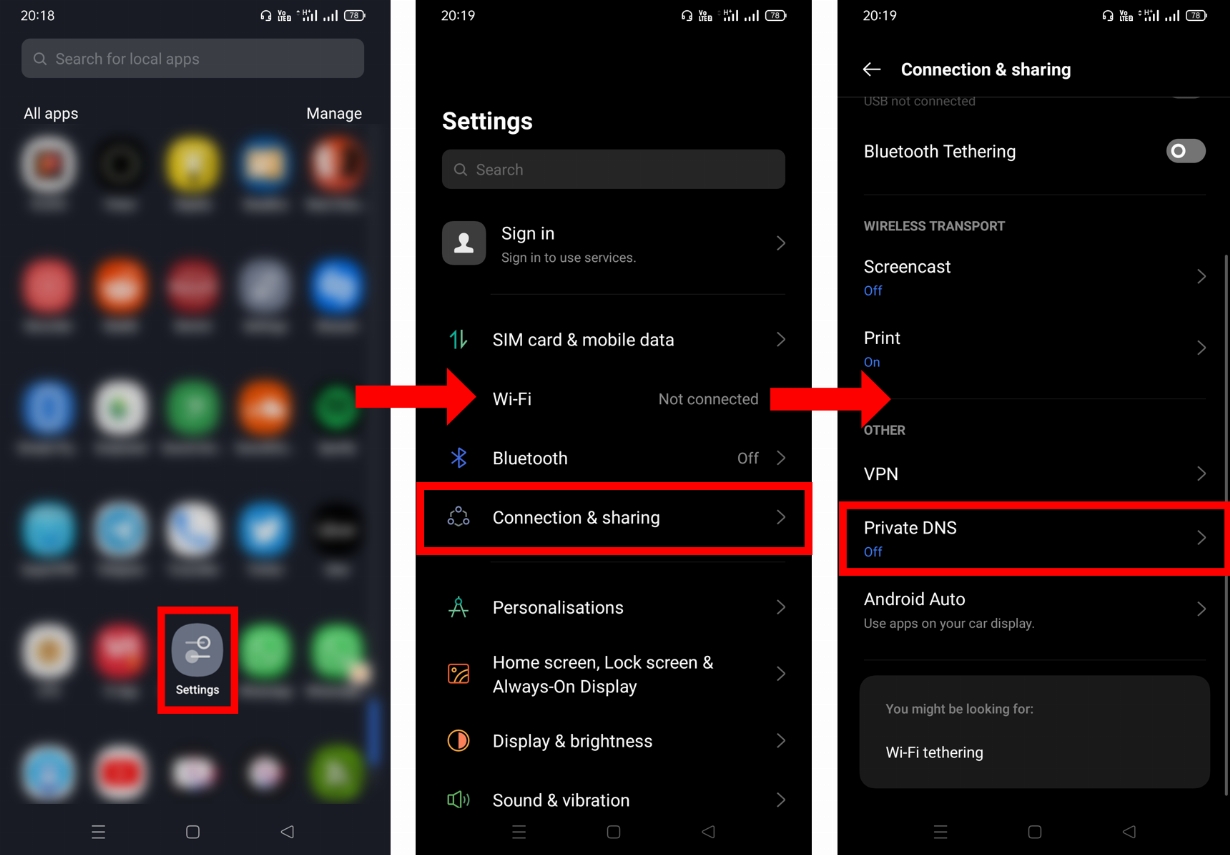
3. Changing the DNS server from Settings App
-
Open the Settings app on your Android device.
-
Then go to Connection & sharing.
-
Click on
Private DNS.

-
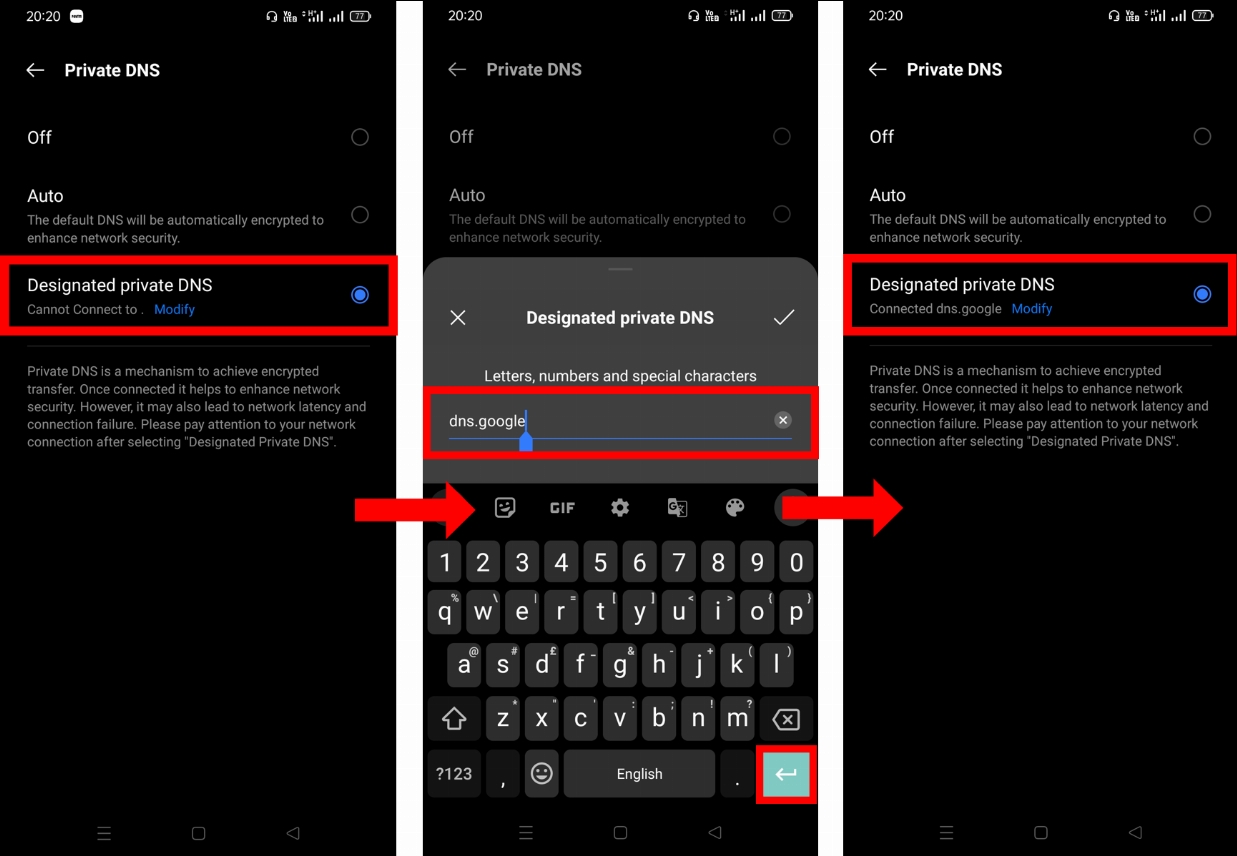
Now select the
Designated private DNSoption and click onModifyto edit it. -
Enter the DNS server of your choice. For example
dns.google(Google DNS),one.one.one.one(Cloudflare DNS), etc. -
Wait a bit until it shows
connected.
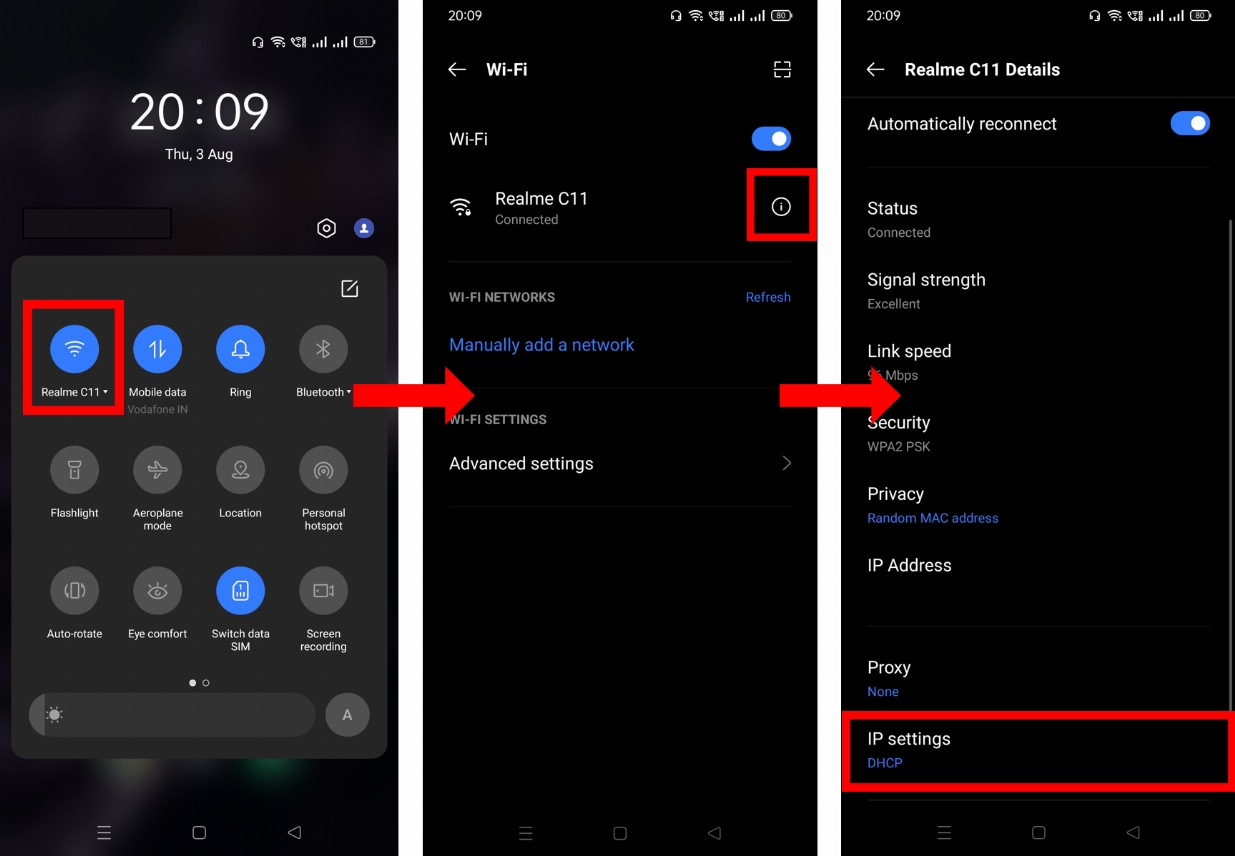
4. Changing the DNS server of the WiFi
-
From the
notification menu, click and hold theWiFi iconto go to WiFi settings. You can also navigate to WiFi settings via Settings app. -
Click on the
i buttonon the WiFi you are connected with to get the details of it. -
Scroll to the bottom and click on
IP settings.
-
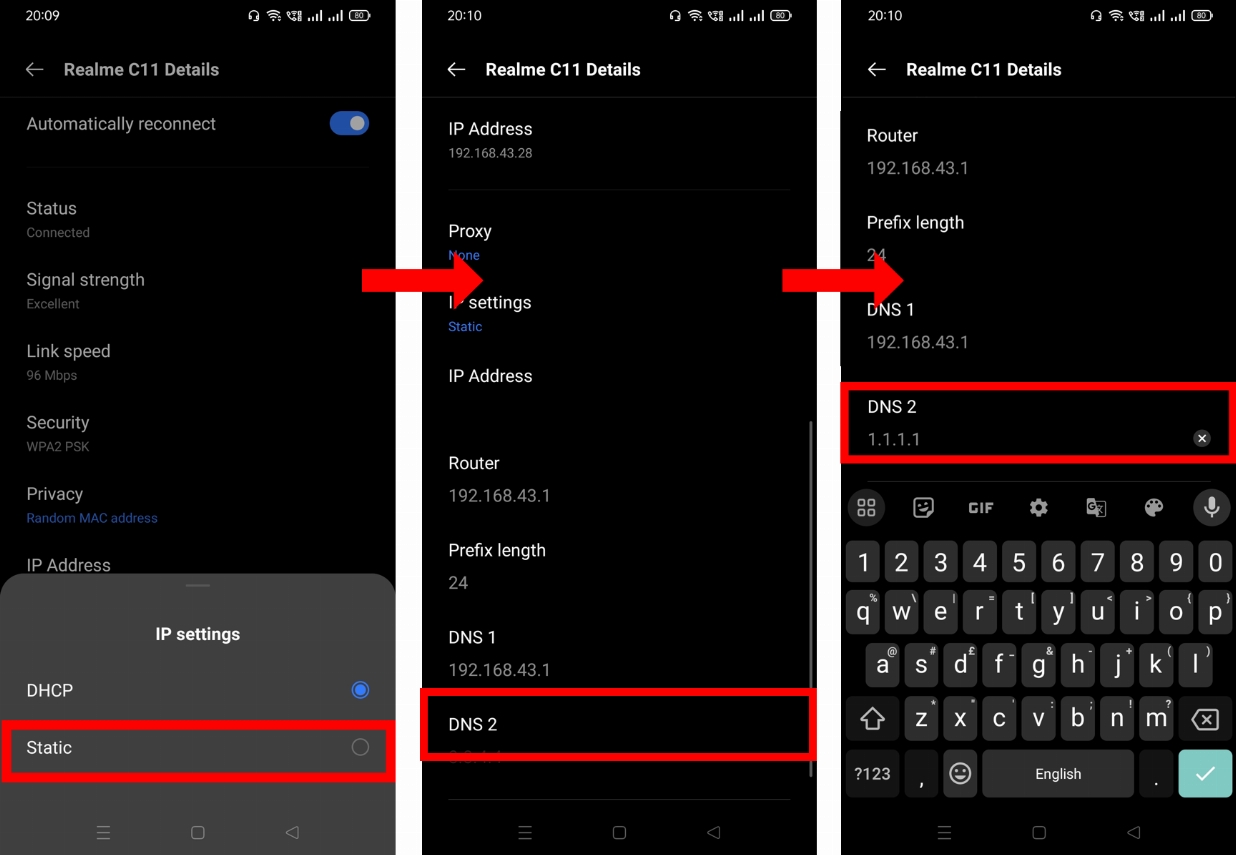
In IP settings option, select
Static. -
Now you will be seeing
DNS 1andDNS 2options. -
Set the DNS of your choice and then reconnect to the same WiFi network. Your DNS issue will likely be resolved.