USB debugging is a method with which an android device can establish communication with a computer. After you enable USB debugging, you can directly move files, run commands, or install applications from your computer. It is designed especially for Android developers helping them perform advanced operations and use advanced tools making android development a lot easier. After enabling USB debugging you will be the new owner of your Android device.
Contents [hide]
What Is USB Debugging?
USB Debugging is just a way for Android devices to communicate with the computer using the SDK(Sofware development kit). It is an advanced feature and remains hidden for the users. It allows you to transfer the files from your Android phone to the computer and vice versa.
The Need To Enable USB Debugging
There are lots of advanced features available in an Android device that you can use after you enable USB debugging. These features are used more commonly by special users like developers. Developers often require advanced tools and a proper development environment to create apps for a certain platform. For this purpose, they install the Android Software Development Kit (SDK) and Android Studio on their computers and may also want to test their application in a real environment.
USB Debugging in android will help developers take advantage of these tools without having to transfer files between devices and complete other actions manually. So, if you want to customize (install root, install the custom recovery, install custom ROM) your Android device then the first thing you need to do is to turn on USB debugging.
Is USB Debugging Safe?
The USB debugging mode in android allows special access to your device hence it may risk information and data on it. Hence, the android USB debugging mode should be enabled only when it is needed. So always make sure that you turn off USB debugging when not needed.
Related Article: How to install stock ROM in Samsung using Odin
How To Enable USB Debugging On Your Android devices
-
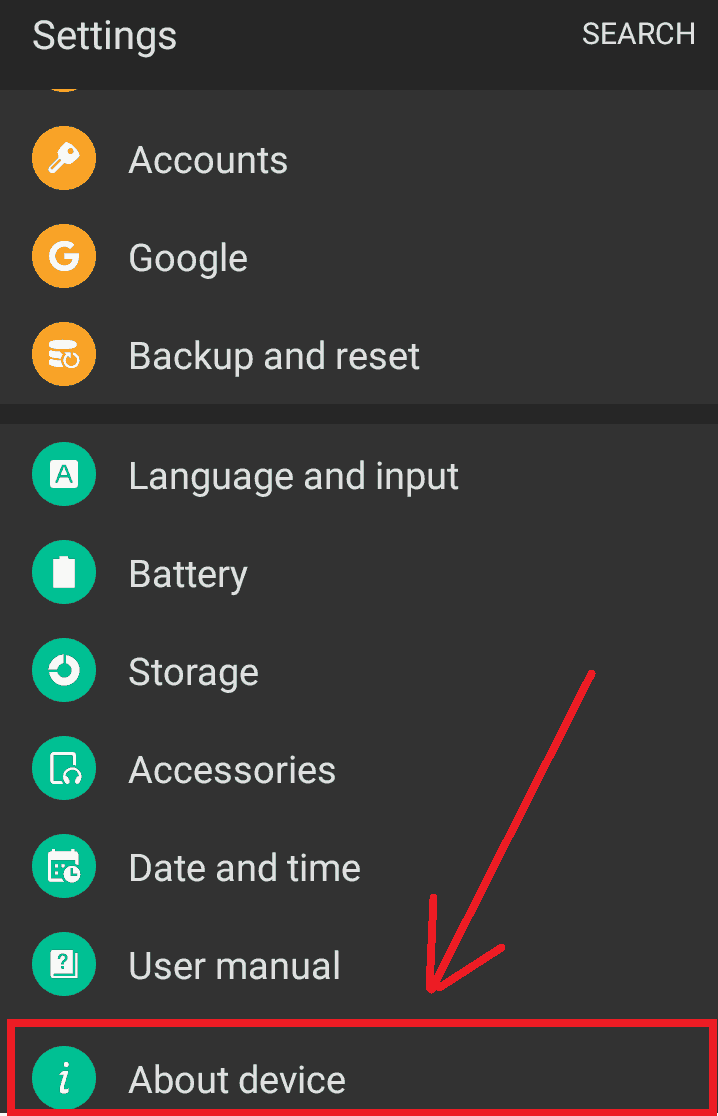
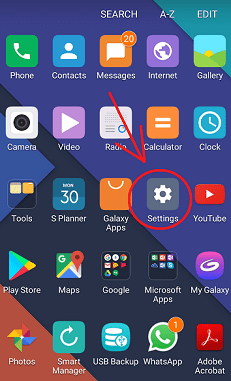
The first step is to go to your mobile settings. Open the main menu and navigate to the setting icon and click on it.
-
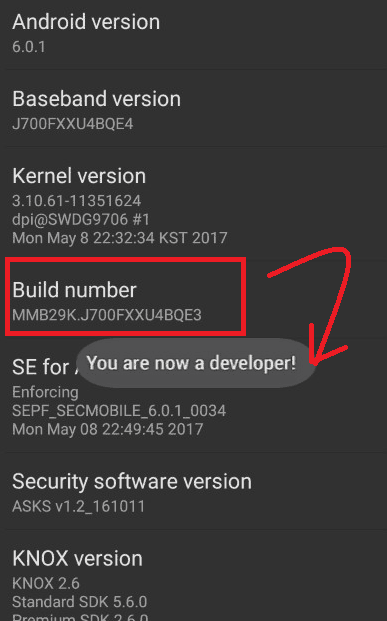
Here you need to enable Developer options. To do so just tab Build number(software info on some devices) 7 times. You will see a pop-up“You are now a developer!”.
-
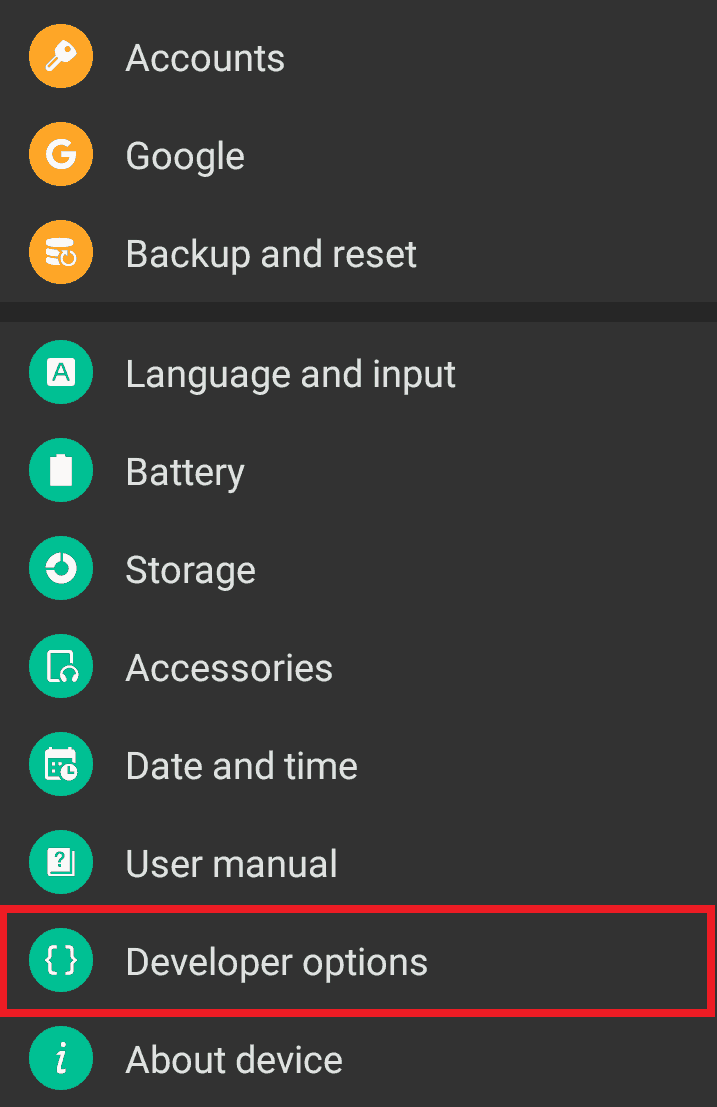
After you see the pop-up,go back to the Settings. You will now see that the Developer options in your android is enabled.
-
Now just click onDeveloper options and scroll down. You will see theUSB debuggingoption. Just click on it to enable USB debugging.
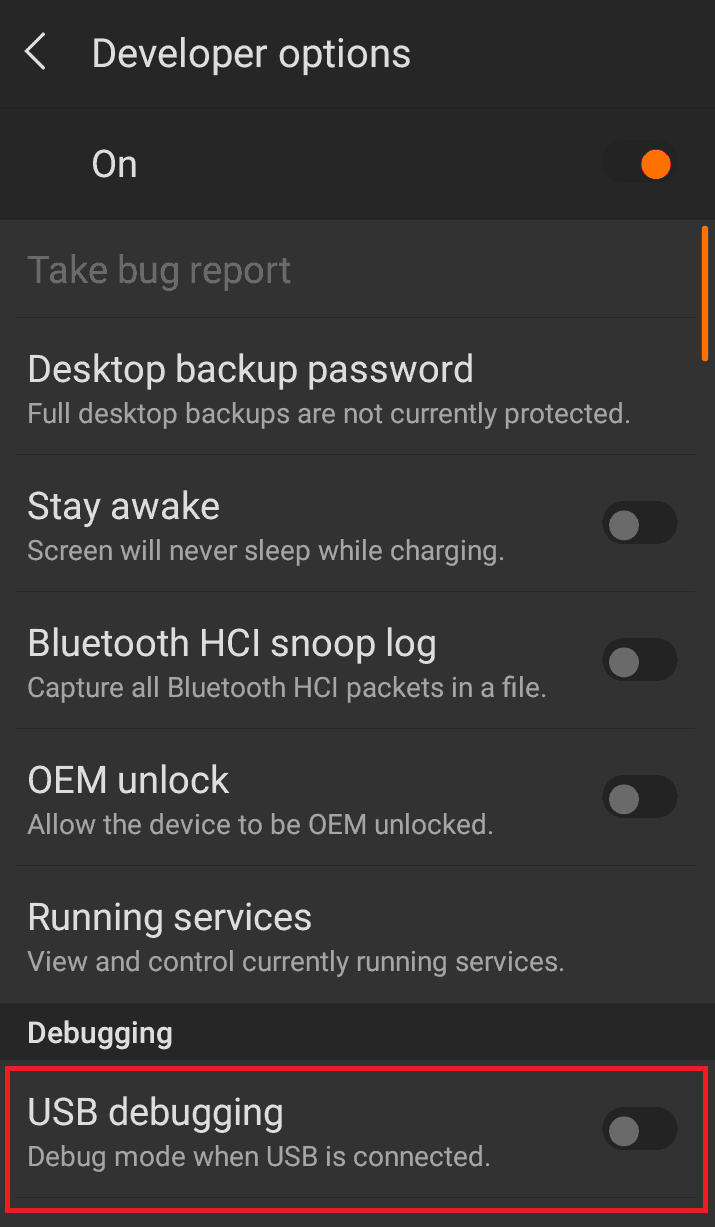
That’s it! Once you turn on USB debugging, you will be able to root your Android, install custom ROM and do lots of other things. You will be the real owner of your Android device. You can manipulate your Android device from the computer using SDK (Sofware development kit).
Note: Remember to disable USB debugging after use since it may put your personal data at risk.
To turn off USB debugging in Android, simply go to Settings > Developer options, and disable USB debugging.
Also Read: How to Root any Samsung Galaxy device with CF-Auto-Root using ODIN

