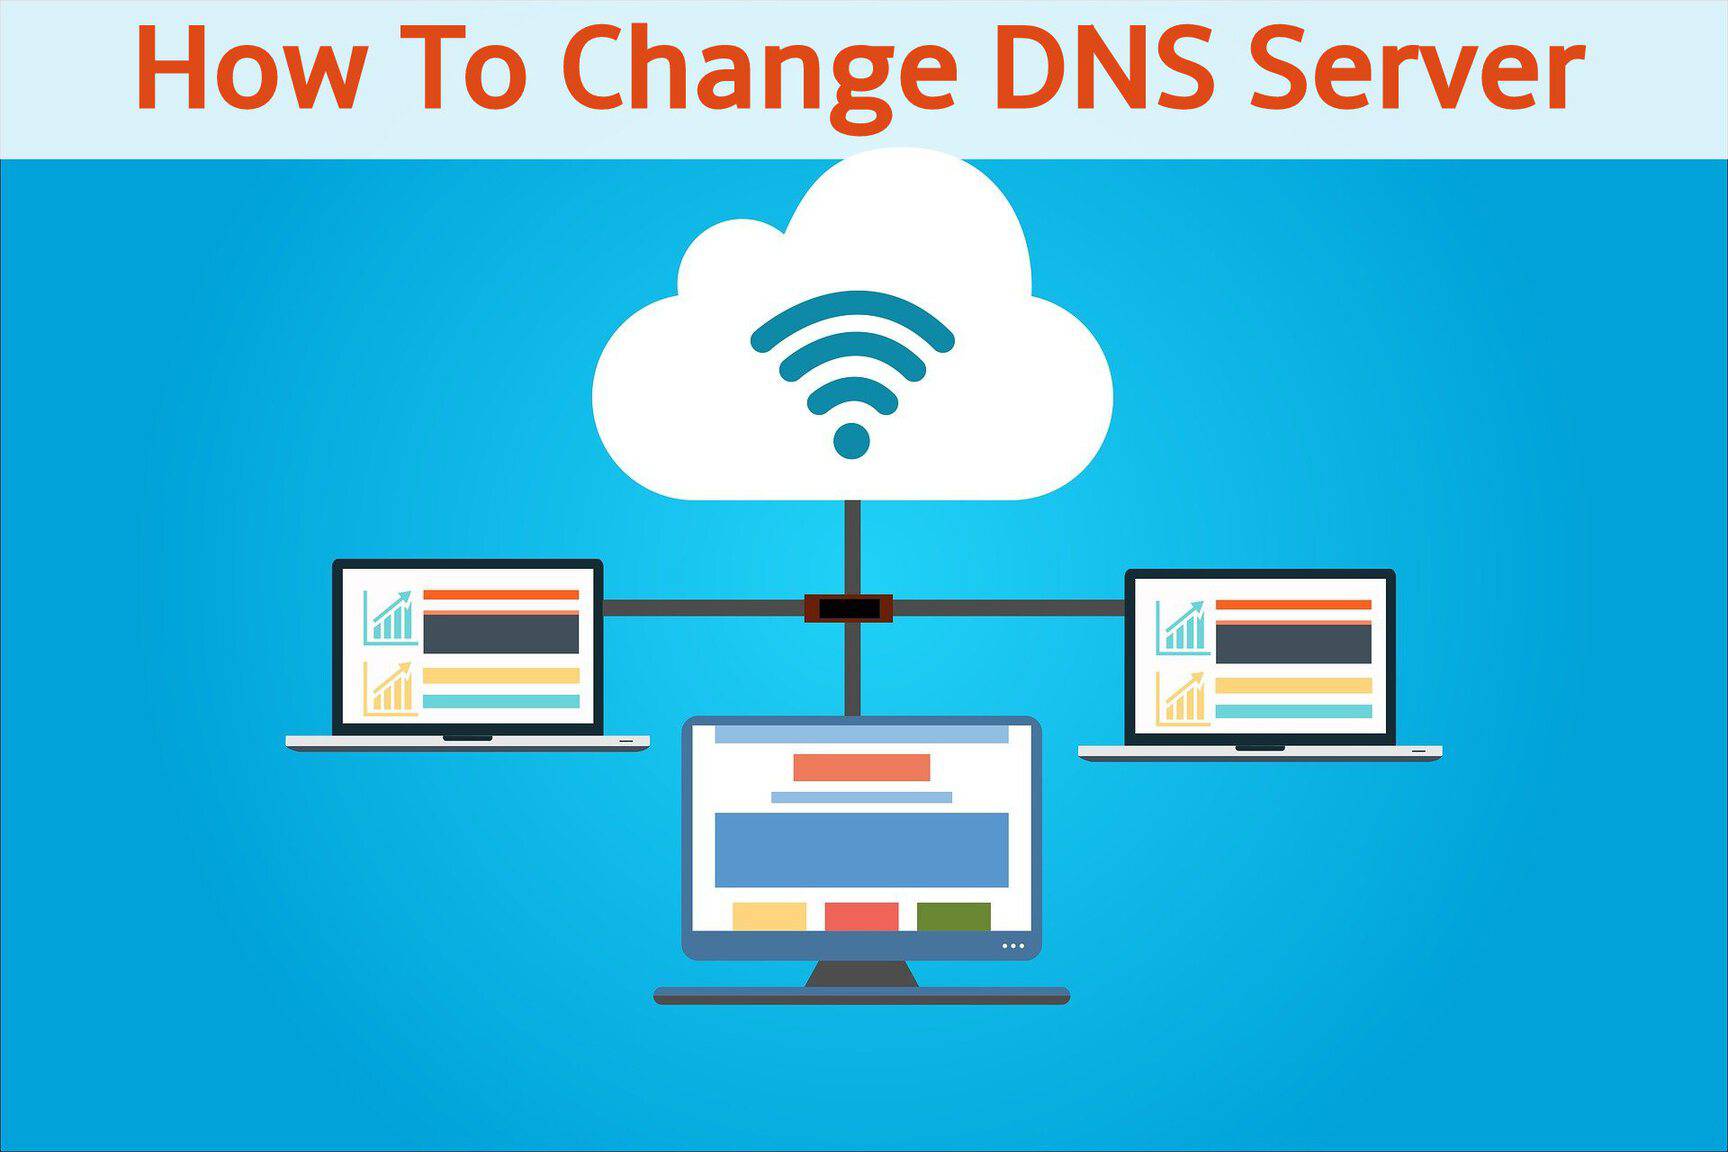
If you are experiencing a slow internet connection or you are unable to access some websites there must be something wrong with your default DNS server. The only immediate solution is to change DNS Server on your PC or mobile device. Changing the DNS server and setting a private DNS not only keeps you safe from a malicious website but also speeds things up. But before moving on to how to change the DNS server on Android, iOS, Mac, and Windows, knowing about DNS is very important. Let’s get started.
Contents [hide]
What is DNS?
DNS or Domain Naming System is nothing but a dictionary of IP address to Domain Name Server. With every DNS there is an IP address associated with it. In simpler words, DNS is the human-readable format that machines cannot understand whereas IP address is machine-readable. You can access any website by its domain name or by IP address like Facebook can be accessed using the 157.240.10.35 IP address.
These IP addresses are just numbers used by computers on the internet to communicate with each other. Humans cannot remember numbers and it becomes very inconvenient to use IP addresses while using the internet. So to make things easier for us, DNS came into existence. Now all you have to do is enter the domain name and you will be at the desired place.
Now that you know what is DNS everything might look simple but it is actually not that easy. There are three types of DNS servers namelyDNS stub resolver server, DNS recursive resolver server, DNS authoritative server.
What Happens When you Change the DNS?
In simple words change the DNS server means gaining control over the network to navigate the internet. When you will be changing the DNS server, you will have to set the IP address by which you will be instructing the browsers or any other web applications to use the new DNS server to complete your command.
The reasons you might want to change DNS Server on any device whether it is Android, iPhone, or Windows PC:
-
The default servers are sometimes slow in comparison to third-party DNS servers. So, if you want to speed things up you can change the DNS server on your device.
-
Secondly, some DNS servers provide better services such as blocking bad content and keeping you safe from prying eyes.
-
Additionally, you can have access to blocked content when you change the DNS servers on Android, iOS, Mac, and Windows PC.
Related Article: How To Access Router From Outside Network
Best DNS Servers for Your Device
So if you don’t know which DNS server is best to configure then below is a list of some best Public DNS servers that you can use. These public DNS servers are free, reliable, and trusted DNS servers.
-
Google DNS– 8.8.8.8 / 8.8.4.4 (Hostname: dns.google)
-
Cloudflare DNS– 1.1.1.1 / 1.0.0.1 (Hostname: 1dot1dot1dot1.cloudflare-dns.com)
-
Cleanbrowsing DNS– 185.228.168.9:853 (Hostname: security-filter-dns.cleanbrowsing.org)
-
Quad9 DNS– 9.9.9.9 (Hostname: dns.quad9.net)
Check out other free and Public DNS servers: Best Free and Public DNS Servers That You Can Use
Steps to Change DNS Serveron Android
-
The first step to change the DNS server on your Android devices is to open phone settings where you will find connection settings. Just click on the
connectionssetting. -
Next, under the connections setting, click on
More Connection Settings.
-
In the connection setting, you will find the Private DNS tab, click on it.
-
Now, select the Private DNS provider hostname and enter the hostname of the DNS provider and click on the save button to save the setting.
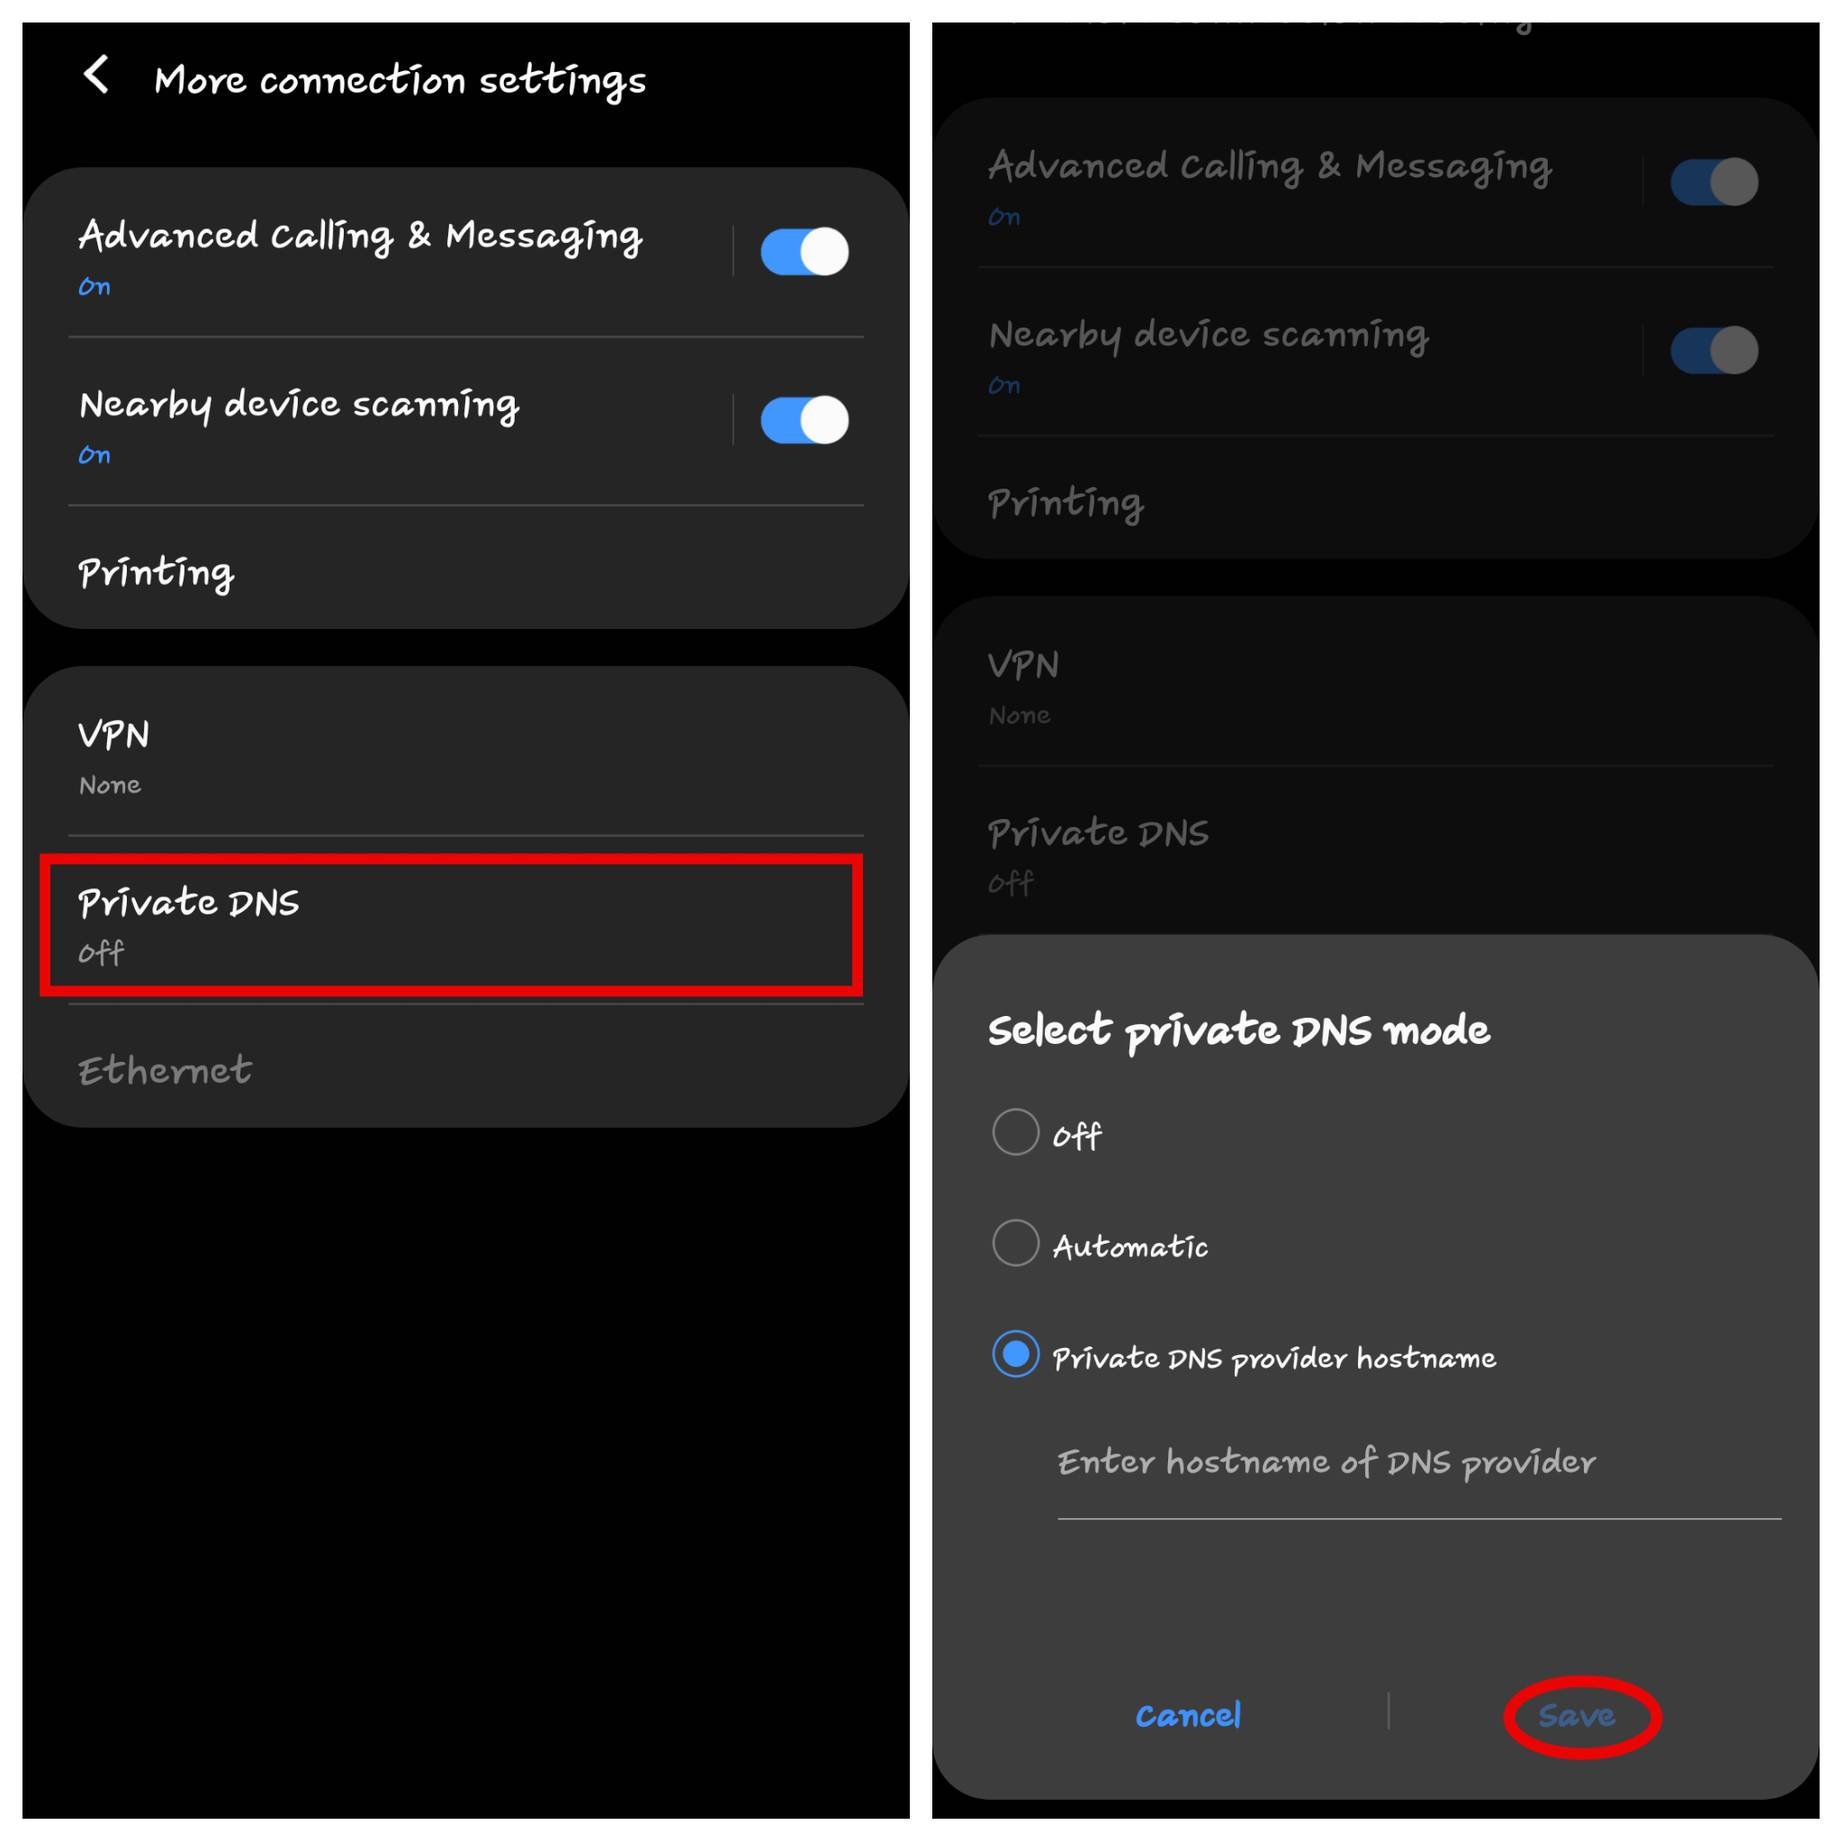
-
You can try to enter the Google DNS(dns.google)in the DNS provider box and save it.
Note:On Android devices, you cant enter the numeric values so you have to add the DSN hostname server names.
Steps to Change DNS Serveron iPhone and iPad
-
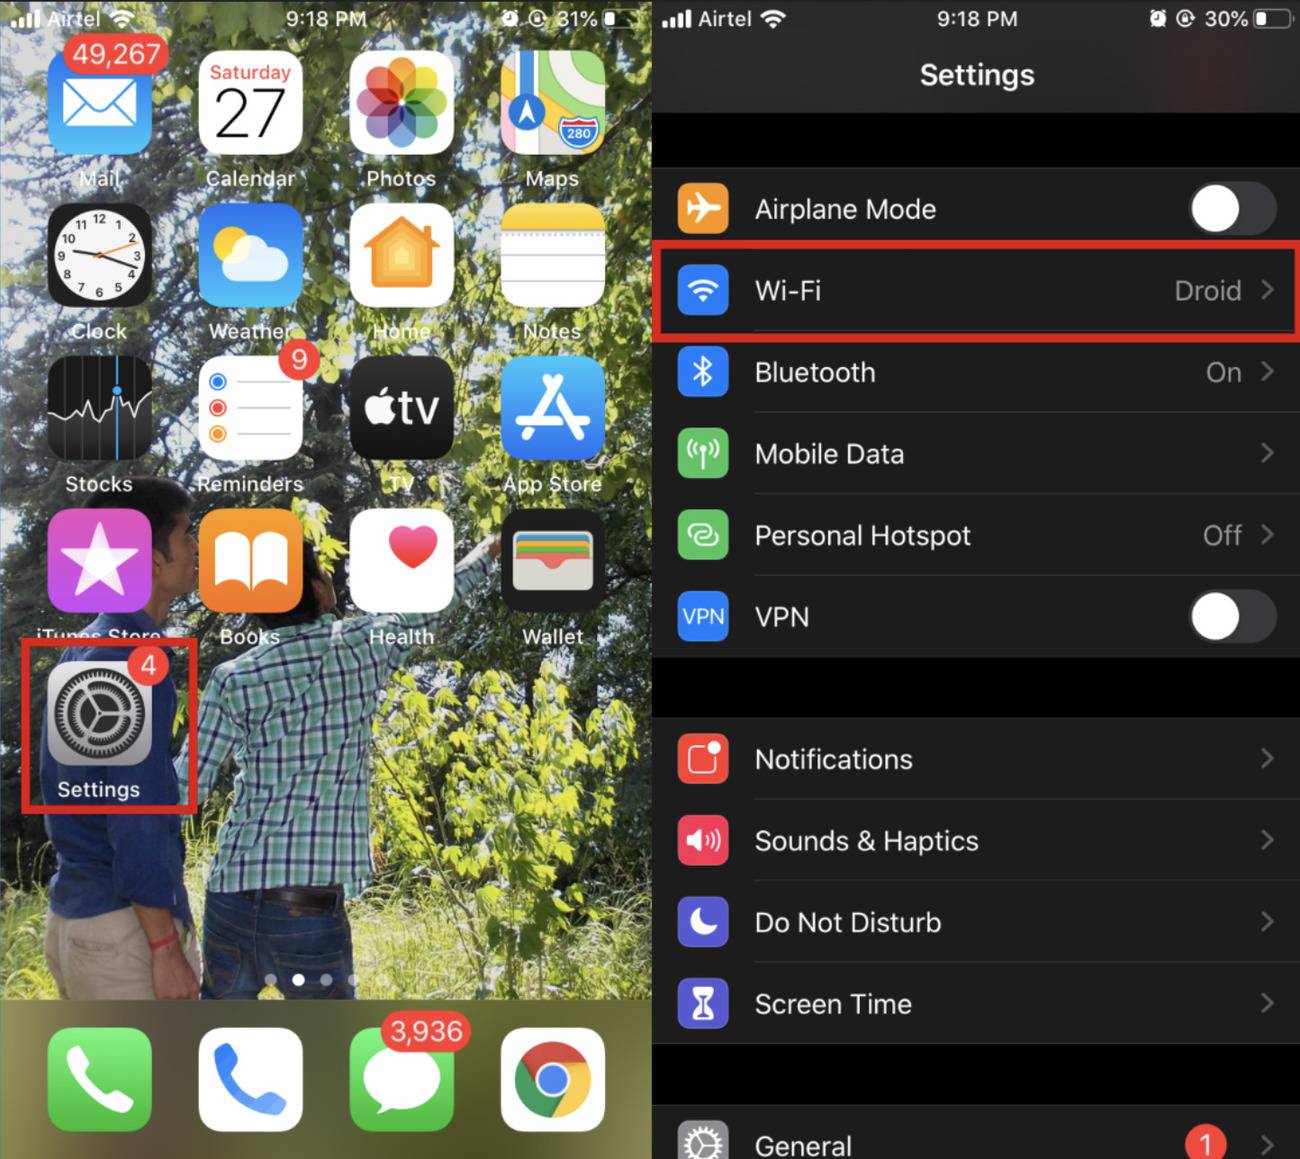
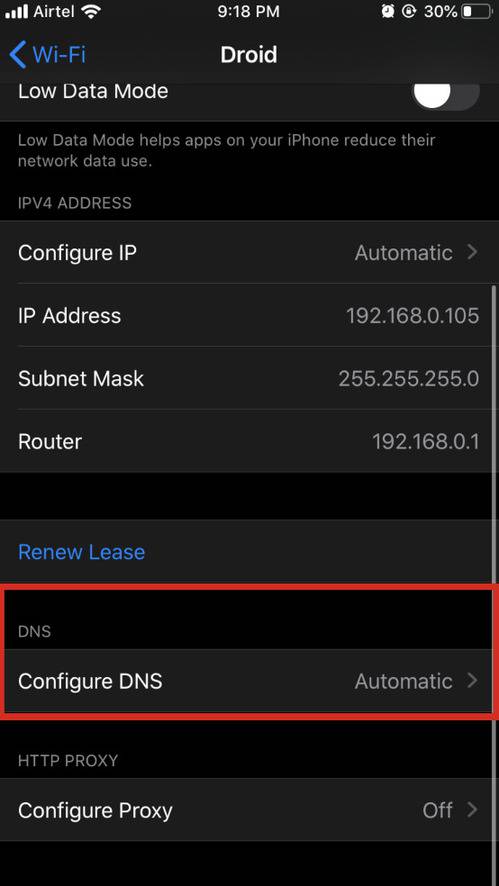
To configure DNS in the iOS device, you need to open the setting and click on
WIFI.
-
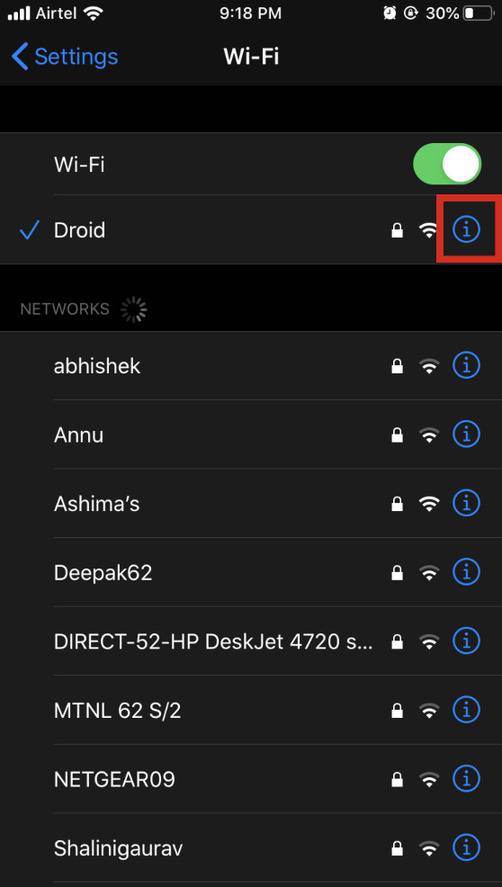
Next, click on the
iicon right to the WIFI network that you want to configure the DNS.
-
Now just click on
ConfigureDNS option. This will opens the DNS setting page.
-
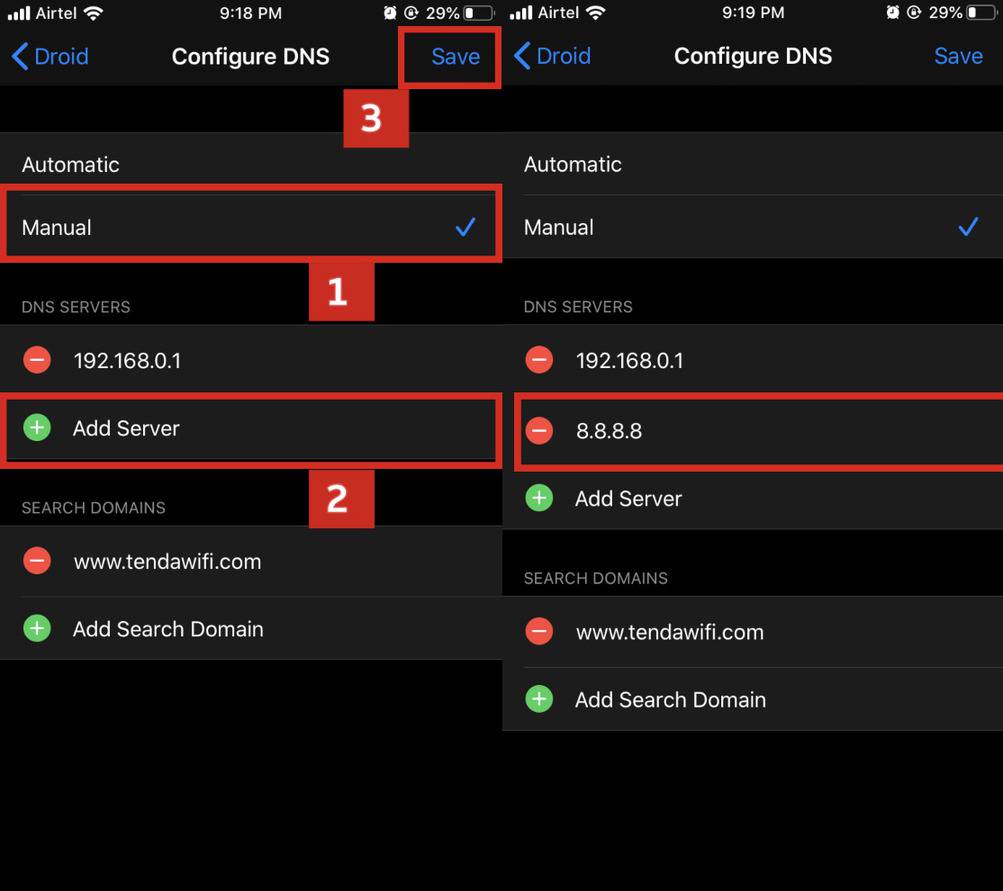
In the DNS setting page, select the
manualoption, enter the DNS server and save the setting.
Steps to Change DNS Server on Mac OS
-
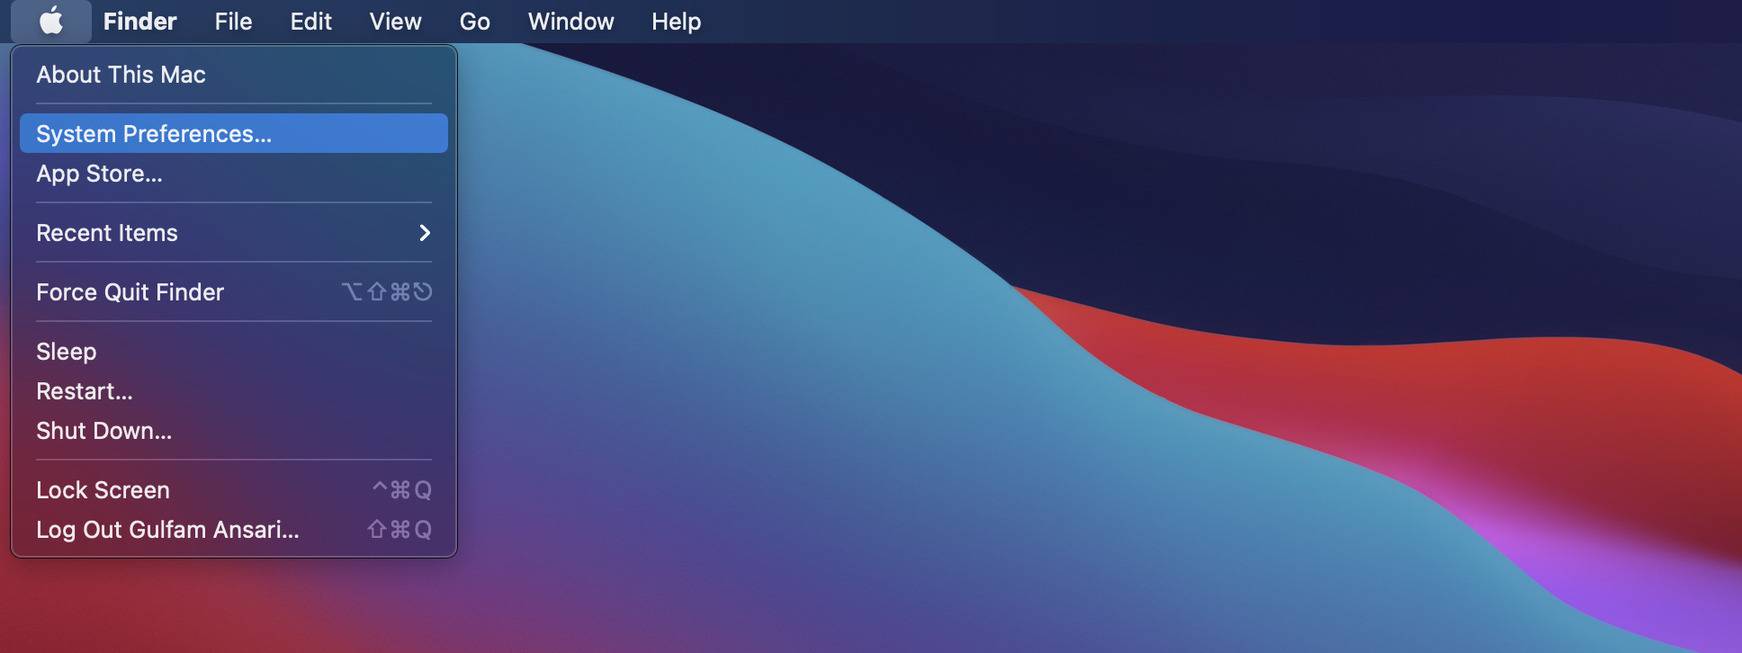
The first step is to open
SystemPreferenceson your Mac. To open SystemPreferences, just click on the Apple icon which is located on the top left corner, and selectSystemPreferences.
-
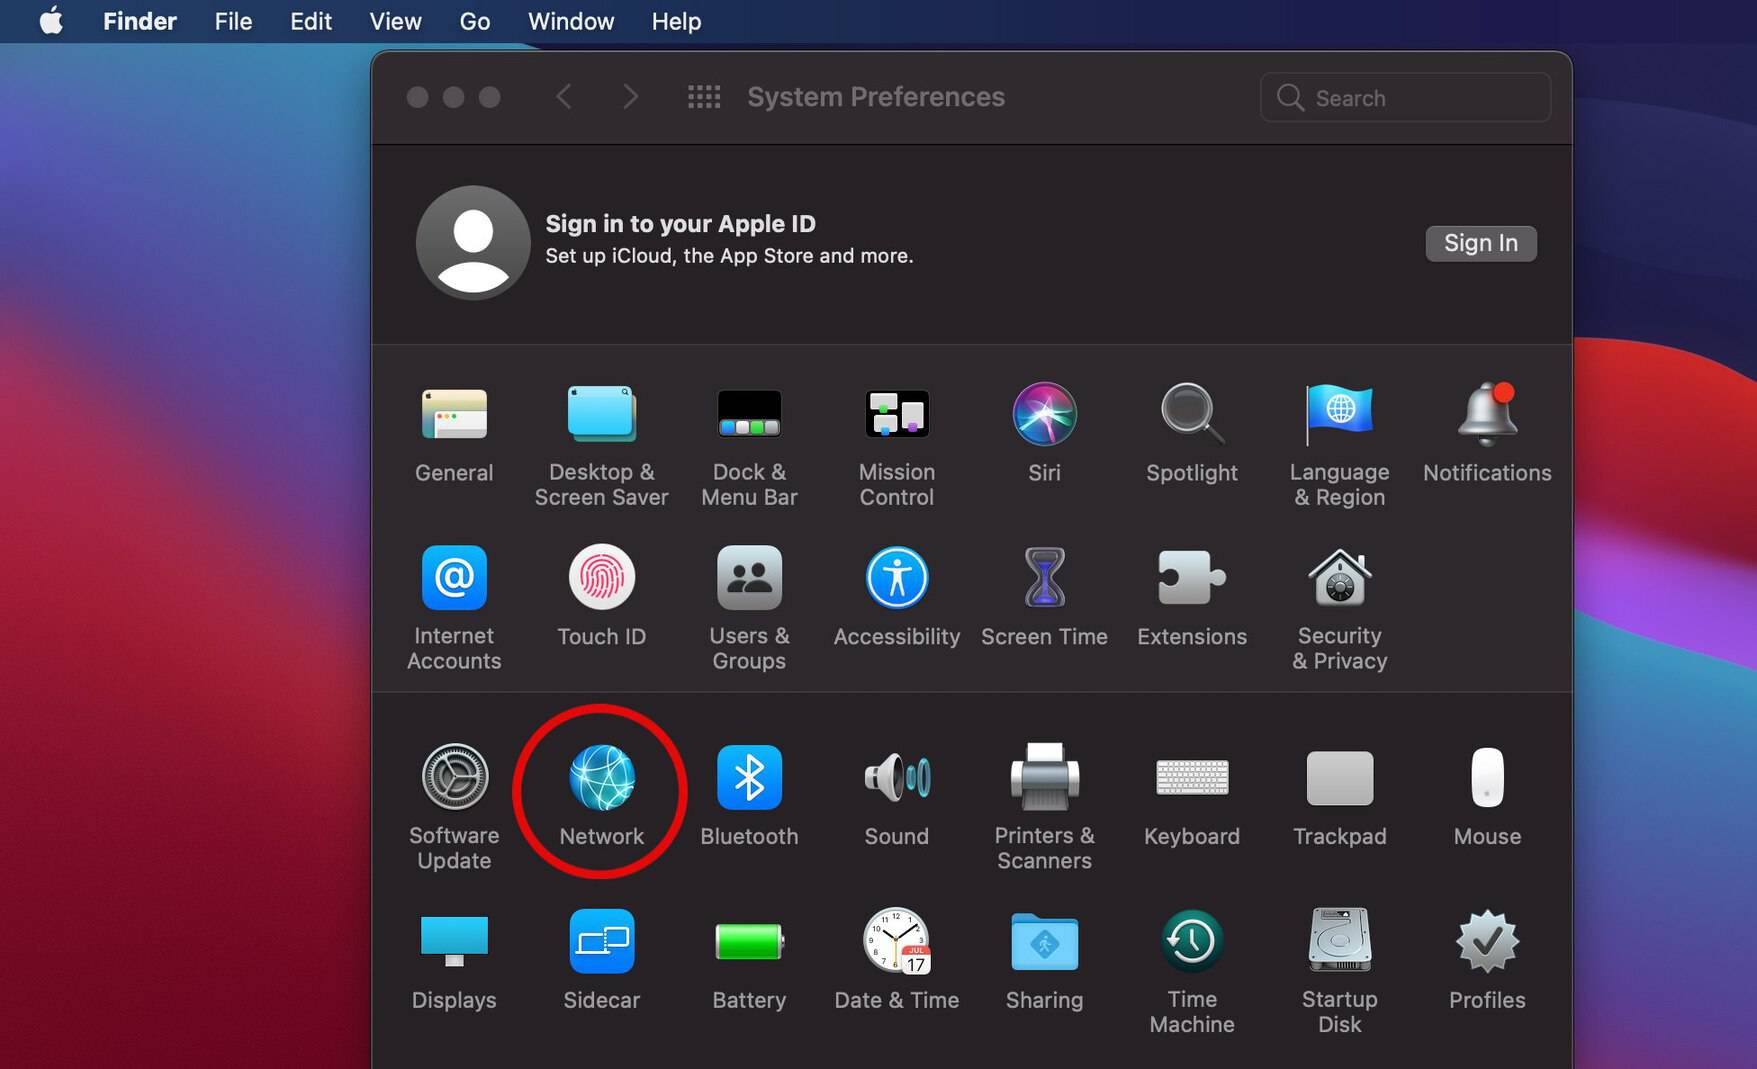
In the System Preferences window, look for
Networkand click on it.
-
There will be a list of network connections on the left sidebar where you will have to select the network connection service you want to use like Wi-Fi or Ethernet. After doing so, click on “Advanced”.

-
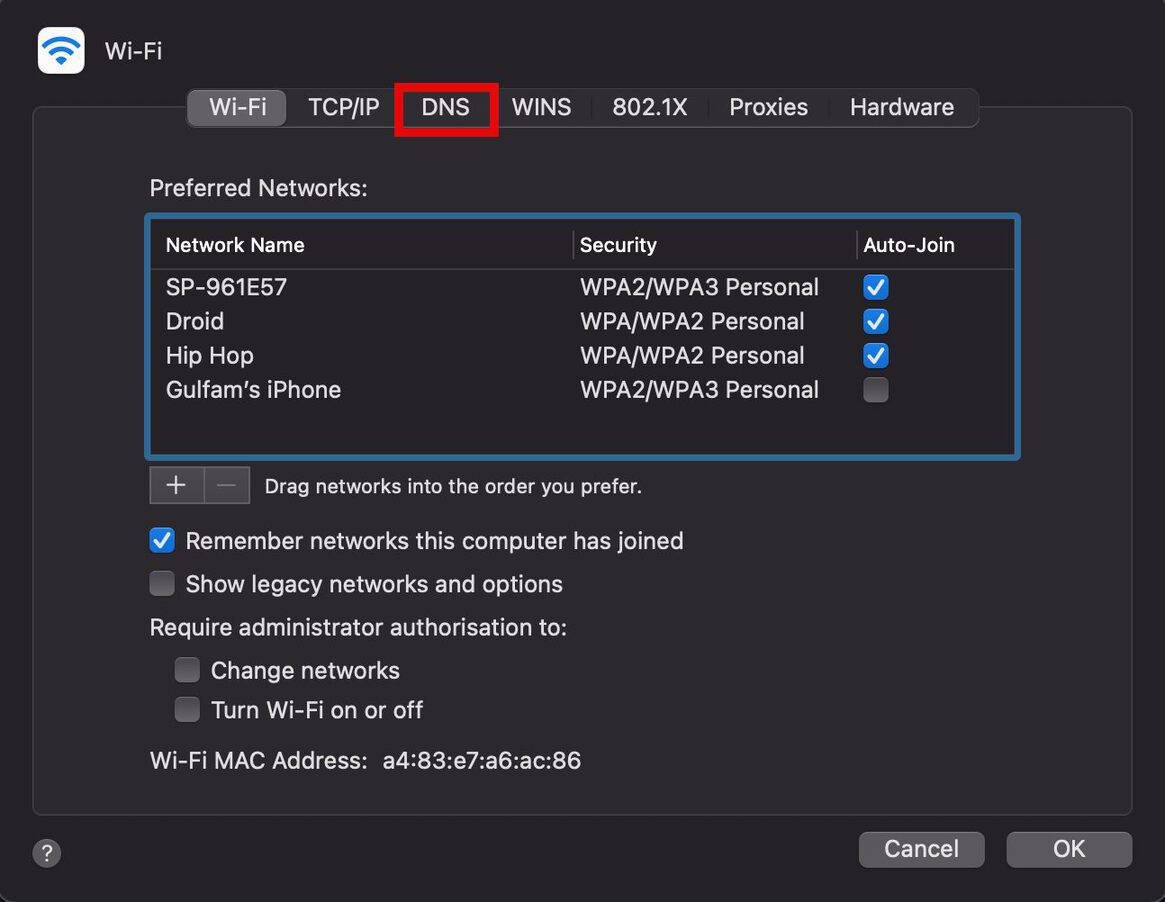
In the advance setting, select the DNS tab and click on
+icon to add the DNS server.
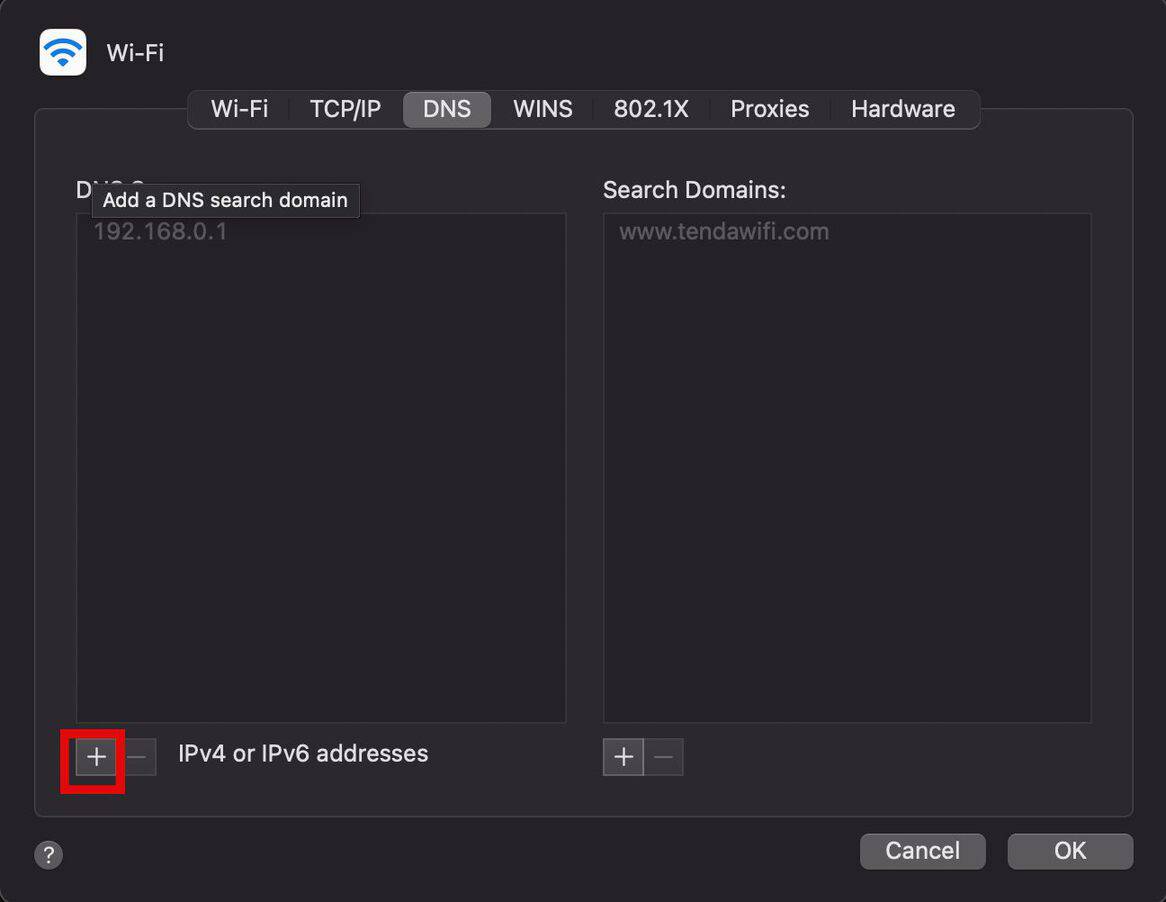
-
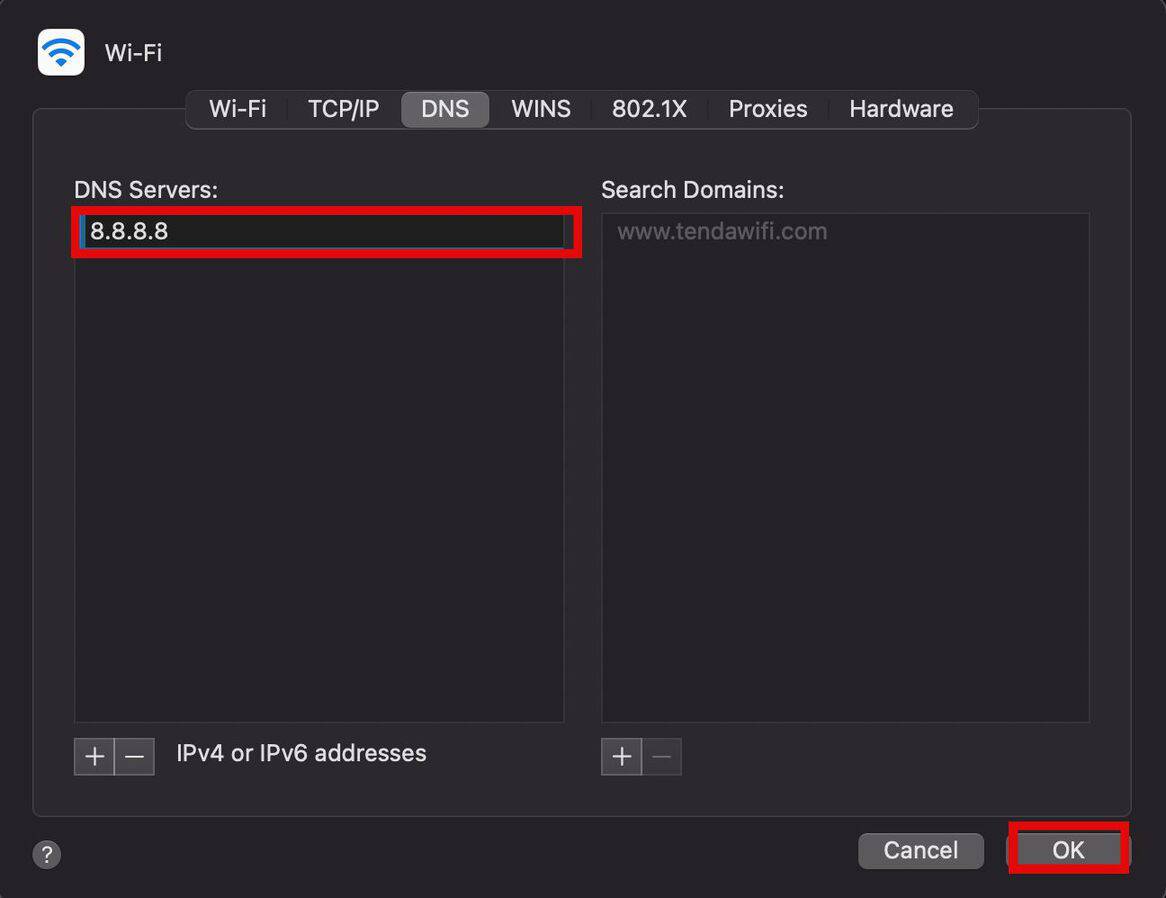
Now, just enter the IPv4 or IPv6 address for the DNS server.After you are done, click OK to save your settings.
You can also click on Add button present at the bottom of the Search Domain list. Next, enter the search Domain.
Steps to Change DNS Server on Windows Operating System
-
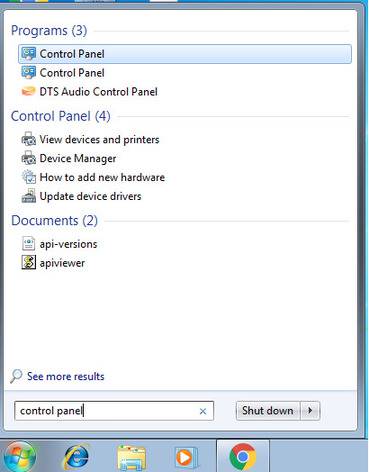
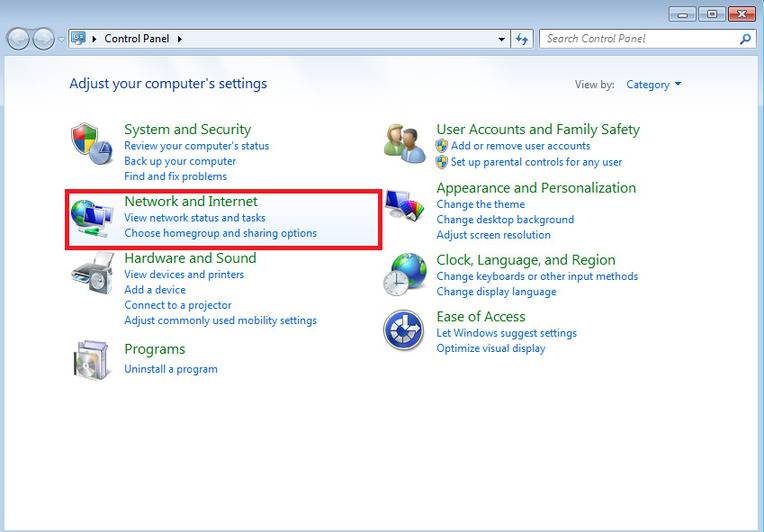
The first step is to click on the Windows icon and search for the control panel and open it.
-
Inside the Control panel, click on
Network and Internet>Network and Sharing Center.

-
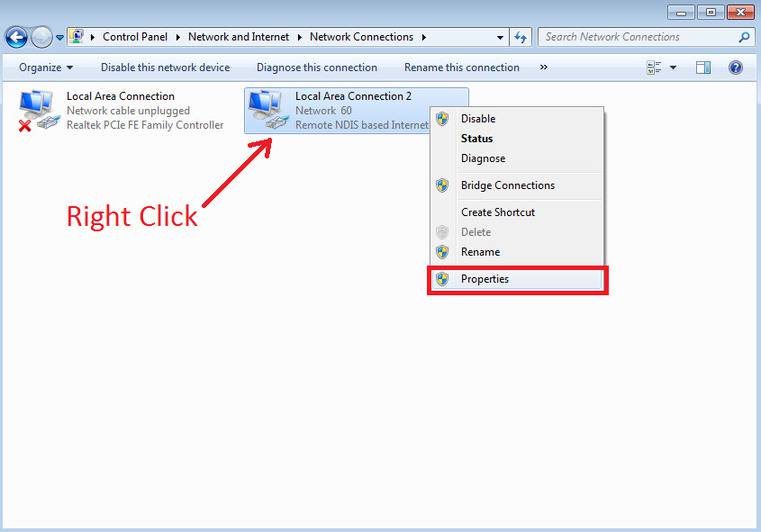
Next, you will have to click on
Change Adapter Settings.

-
Once done you have to select the connection for which you want to edit the DNS. If it’s for Ethernet Connection or wireless connection, right-click on it and select Properties.
-
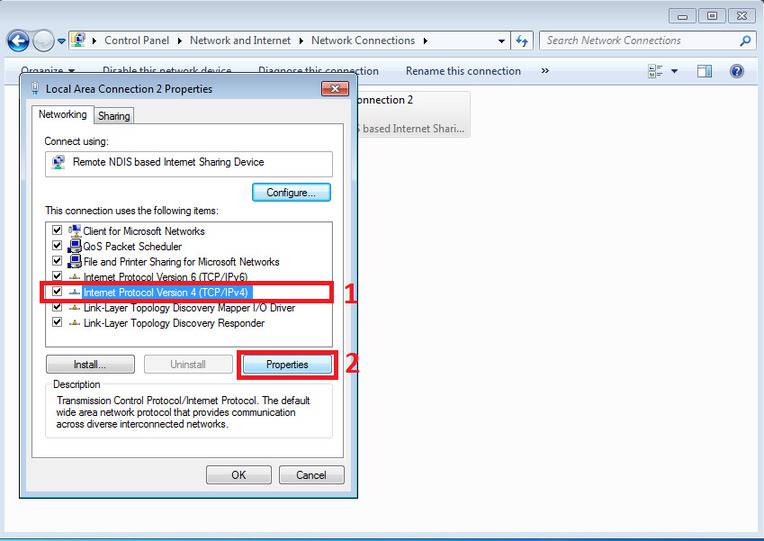
Next, select the
Networkingtab followed by selecting Internet Protocol Version 4(TCP/IPv4) orInternet Protocol Version 6 (TCP/IPv6) and click onProperties.
-
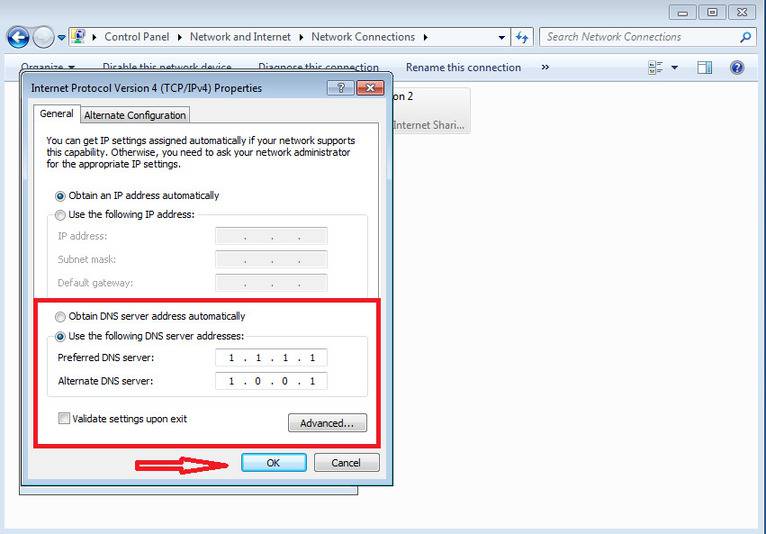
Next, in the properties tab, click on
Use the following DNS server addressand enter the DNS server IP address. Now click on thesavebutton to save the changes.
Note: In the above steps, we use Windows 7 for demonstration but you can follow the same steps to change the DNS server for Windows 8 and Windows 10 both.
